


Can You Beat Dark Souls at Level 1? Part II: The Chosen - Article
by Issa Maki , posted on 27 March 2023 / 2,514 ViewsLet's recap:
On the last exciting episode of Issa and Friends, we had just used over-powered Pyromancy to defeat Smough and Ornstein, claiming the Lordvessel for our own. Since then, my war council has largely disbanded (who has time for birthday parties when we're talking about Dark Souls?) and I've discovered the horrors of introducing turmeric and cumin to cotton. Until the return of my advisors, I have no choice but to give out some field promotions. So come with me, sub-commander, and let's finish this journey together.
After placing the Lordvessel, anybody seeking to retain Solaire's services may want to meet up with him at the Sunlight Altar. The Lord Souls can be tackled in whatever order you feel like, but from this point forward, my approach is going to start becoming more conservative (and a little dry - I apologize).
Call it the sorcerer in me, but for some reason I always go for The Duke's Archives. Unless you're going out of your way to get Black Flame from the DLC, all we're going to do here is go up the elevator, pick a fight we can't win, and get arrested. The Rare Ring of Sacrifice will help preserve your Humanity, along with keeping Seath's 'Curse' at bay. Escaping from the jail is no different for us than anyone else; enemies we come across will be intolerant to Pyromancy, but their highly damaging attacks will catch you if you're sleeping. With no items we need (or reason to free Logan), our only objective in the Archives is to simply leave. Don't forget that you might have to rearrange the stairs if you end up dying; a minor inconvenience, but at least we're not trying to get Avelyn!
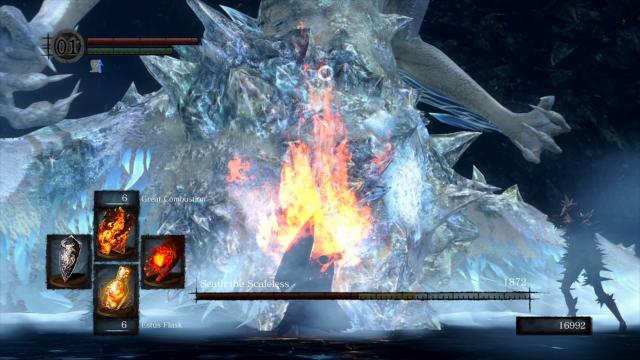
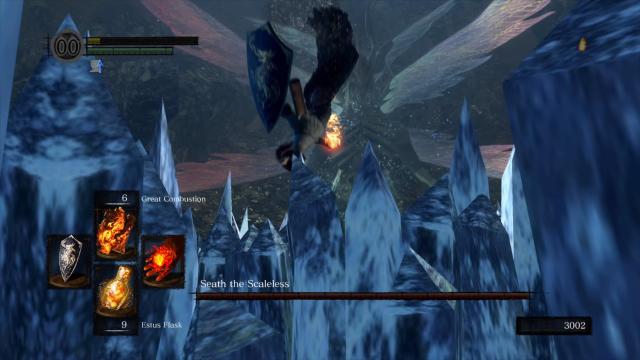
Similarly, the Crystal Cave holds nothing of interest except the boss fight at the end. If you're having trouble figuring out how to proceed, the falling snow helps show the outlines of the platforms that can be traversed upon. As for Seath, he takes over 900 damage from a fully upgraded Pyromancy Flame and is such a large target, it's almost harder to avoid harming him. While his attacks are slow and easy to evade, problems can quickly arise if any of the enemies from the previous area managed to sneak into the boss area. Keep your eyes peeled and make sure there's nothing hiding inside of Seath's screen-encompassing attacks that might trip you up. One can also quit and reload the game to put up a fog gate, ensuring a private audience with the Duke.
Preparing for Gravelord Nito and the Tomb of the Giants takes me longer than I care to admit, so we head for the Demon Ruins. Remember when I told you about needing 30 Humanity last month? Offering them to the Daughter of Chaos unlocks the shortcut to Lost Izalith. This bypasses Demon Firesage and the Demon Centipede – at the cost of not being able to summon Solaire for Gwyn. I wish I had some better news, but if you know a reliable method to get the Orange Charred Ring at SL1, I'd love to learn how you do it.
By utilizing said shortcut (don't forget to grab the Sunlight Maggot from the bugs!), we'll be able to reach the boss with minimal effort. A lone Titanite Demon (who regenerates) and Pyromancer (who does not) offer token resistance. Deal with them how you will, but just know that this is the part of the game where I die the most frequently. What's about to proceed won't be graceful, but the end result is a tried-and-true method for getting past what's easily the most bizarre encounter in Dark Souls.
Similar to the Dragon God in Demon's Souls, the Bed of Chaos is more of an 'experience' than a traditional boss fight. Essentially, there are three weak points we have to hit: an easy one, a not-so-easy one, and one that takes some luck.
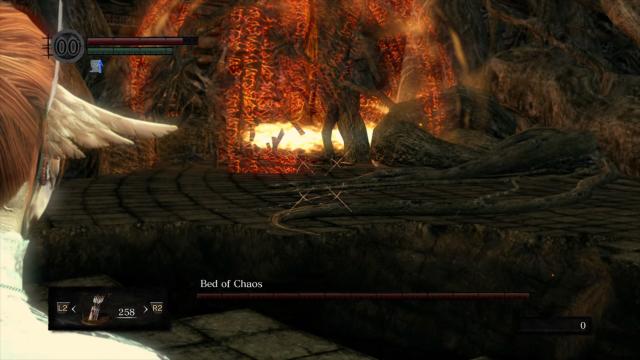
Start things off by following the outskirts of the level to the right with a shield up and an eye on the sky. A clean hit from the Bed of Chaos will more than likely be fatal, but its half-hearted efforts are predictable at this early point; it's a matter of rolling through the bramble, hitting the vulnerable core, and initiating the first cutscene.
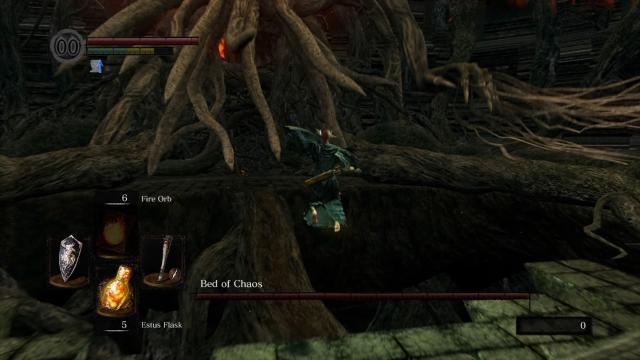
We need to do the same on the left side, but this time we'll employ a different strategy. Hugging the left side of the stage eventually leads to a chokepoint that limits further progress, yet makes for the perfect location to take a defensive stand. Staying by the corner of the nearest wall creates a 'pocket' that's far safer than it appears to be. This is where a bow and arrows come into play; even though we lack the stats to properly wield it in battle, the bow can still be used to clear the branches at a distance while staying (relatively) safe from harm. Though it's not possible to see the second core from this vantage point, it can still be hit by arrows with enough persistence.
The final part is easy to attempt, and even easier to fail. Approaching the Bed of Chaos directly causes it to attack with outstretched arms and flailing limbs. The surrounding floor gives way as the player closes in, revealing their destination. It takes some patience, but what one needs to do is jump to the root structure below, before following the path upwards to the core. Be sure not to get swept off the ledge by the boss' 'beard' as it finishes attacking. Once the center of the Bed of Chaos is breached, the only thing to worry about is the Firestorm spell it randomly casts, which is difficult to predict and dodge efficiently. A single hit is all it takes to end the fight, but luck usually has more to do with it than skill in this instance.
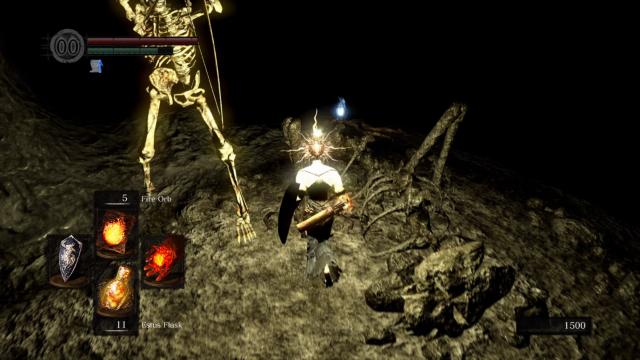
With the Sunlight Maggot in tow, our last preparation for the Tomb of the Giants is to have Andre craft a 'Divine'-class weapon +5. Afterwards, return to the Catacombs, roll off the ledge by the doorway again, but instead of following the path, drop down a second time to the level below. Paladin Leeroy can be summoned if you have the Humanity, serving as a distraction so you can get to the next fight unimpeded.
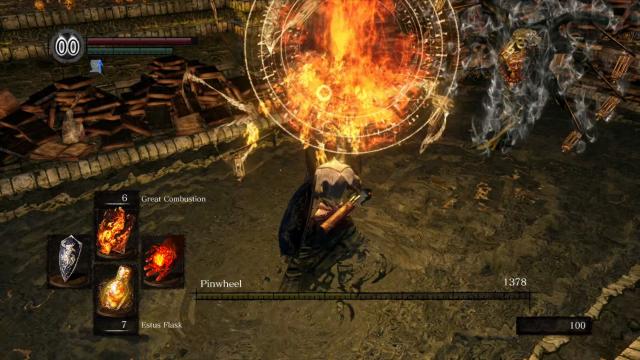
Pinwheel is one of the weakest bosses in Dark Souls, falling in as few as two castings of Great Combustion. Stay aggressive and you should be able to kill it before any resistance can be made; if not, Leeroy will be more than happy to clean up. Take control of the situation early and it'll have a hard time slipping away.
As long as you're following these guidelines, the Tomb of the Giants will be short and innocuous. Most enemies on the way to the first bonfire can either be ignored entirely or taken out with Pyromancy, and as long as you're wearing the Sunlight Maggot, you'll be able to see where you're going while still being able to defend yourself. For those following along at home, I'm about to teach you a shortcut I guarantee will come in handy for any type of run.
From the first bonfire, head left towards Patches and the nearby skeleton dog. Past the fog door is an archer next to an item laying on the ground. Rolling off this edge reveals a hidden platform where the Covetous Silver Serpent Ring is; pursuit is inevitable, but a subsequent jump towards the nearest landmass put players immediately before the second bonfire - essentially skipping the entire area. As long as you keep away from the subsequent skeletons, get close to the undead 'pillars' and dodge ranged attacks with proficiency, you should be able to get to the boss without fighting a single enemy along the way. Stay frosty (and don't forget to swap helmets), as the opening moments of the next encounter dictate the pace of the entire fight.
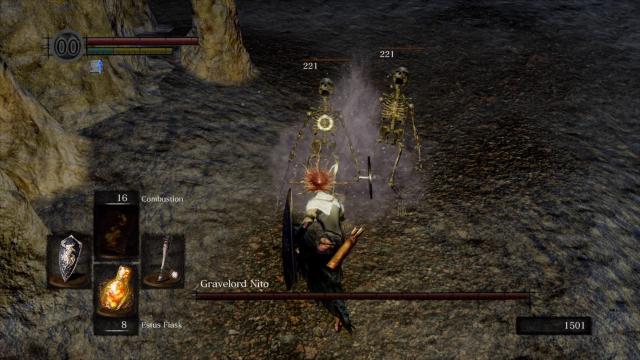
Heavily-armored players will more than likely need to heal after dropping down into the arena, but their chance to do so safely is determined by Nito's initial attack; if the Gravelord Sword Dance (which has a distinct audio cue) comes outs, take evasive maneuvers. Skeleton minions will crash the party, but this is where some earlier preparation comes into play. Normally, enemies that die within the vicinity of Nito reconstitute themselves, but those smitten by a Divine weapon will 'rest in peace' and stay down for good. This largely nullifies Nito's gameplan, as without fodder to muddle up the battlefield, his slow attacks are vulnerable to punishment.
New Londo Ruins has two distinct 'sections', with the first being the most annoying. Transient Curse is required to interact with ghost-class enemies, but until one reaches Ingward mid-way through the level, they're a somewhat precious commodity. The Covetous Gold Serpent Ring and a high Humanity increase the drop-rate of these items, though can be paradoxical to farm unless a curse is already applied. Firebombs are extremely effective for creating AOE pools to compensate for ectoplasmic intangibility, and cheap to boot. After lowering the water level, our main task is establishing a route to the boss, as it can be a time-consuming process to replenish resources. Poise is more helpful against ghosts than one might think, so don't be afraid to armor up.
For any attempt involving Beatrice, you'll be using at least one Humanity, a Transient Curse, and varying amounts of Firebombs – a substantial fee. On top of this, there are several enemies that need to be cleared out before she can be summoned safely. Be particularly mindful of the ghost floating above the character's head as they pass through the fog gate to the boss: if you don't defeat it, Beatrice (who can't apply Transient Curse) will pick a fight she has no hope of resolving. Remember that you can drop down to the second level from the beginning of New Londo after the water drains out (to the right of the first stairwell); you'll avoid several enemies by doing this and be able to get to the boss quickly.
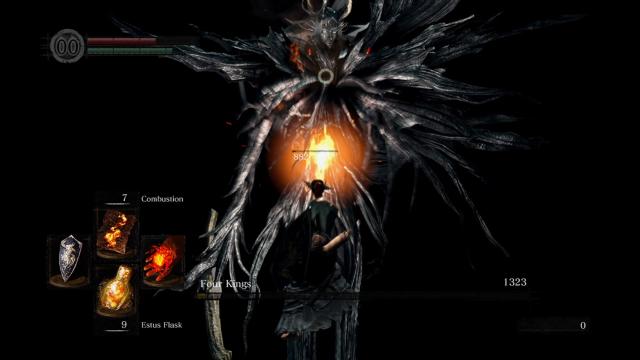
What's important to understand about the Four Kings is that, despite the name, you're not required to defeat four of them – only to drain their overall health bar. Depending on how fast the fight goes, there will be fewer – or more – kings to worry about. This is where Beatrice can prove to be more of a hindrance than an asset; if she ends up being grabbed (which grants the boss invulnerability for several seconds) or provokes a ranged confrontation, valuable time will be lost. The best piece of advice is that the boss can still be damaged after an enemy has been defeated; attacking a king in its death throes gives the player additional time to continue dealing damage. Don't take this opportunity lightly (for the purposes of this article, I only had to fight three kings utilizing this tactic). Armor and weight class are a personal preference, but it's best to adopt an offensive mindset and travel lightly. A good roll offers far more of an advantage than blocking.
Having satiated the Lordvessel, the path to Gwyn is finally unlocked – but be warned: without the Black Knight Shield or Occult Ember, we'll be at a disadvantage that can only be overcome with luck and skill. Worse is that if you've been using this guide for a reference, Solaire won't be available to help. It's not all doom-and-gloom, however; if you can get to this point, there's nothing to fear.
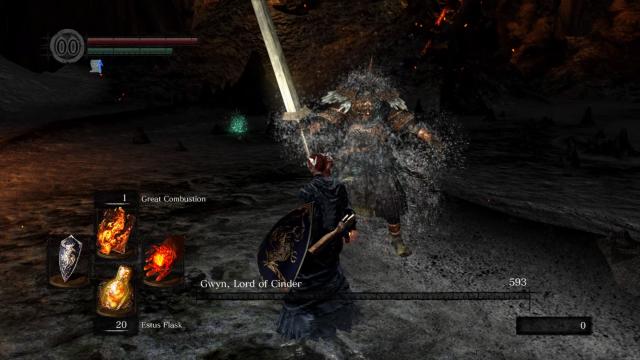
First of all, Gwyn is strangely vulnerable to Pyromancy. It's not quite Homing Soulmass levels of A.I. exploitation, but the title 'Lord of Cinder' quickly becomes ironic foreshadowing. Gwyn is prone to dodging after being hit with Combustion, usually following up with a kick or grab attempt – both of which can be punished. Gwyn frequently leaves himself open to parry attempts while swinging his sword, a strategy you may be forced to employ in creating an opening. As we'll take a guaranteed 15% fire damage on successful blocks (and incur traumatic stamina gauge depletion), there's only so much punishment one can take before attempting to heal. Gwyn's greatest advantage is that once he gets players on their backfoot, he usually puts them down relentlessly. The stalagmites distributed around the level help create some distance, yet are unreliable in stopping lunges and thrusts. Think of it as a battle for momentum: if you're able to maintain pressure, there's not much Gwyn can do; should the situation swing in his favor, it'll be over quickly. Success potentially arrives with as few as seven casts of Great Combustion, though the margin of error is narrow.
And that's all there is to it. Everything you need to defeat Dark Souls at Level 1 is contained within these words (and those previous ones). Like I said, this probably isn't the optimal or 'best' method for doing so, but by abiding to these recommendations you'll achieve what you desire. Stay diligent, remain vigilant, and don't be afraid of making mistakes – you wouldn't be able to improve any in their absence. We learn more from hard failures than easy successes; it's not the most fun process, but it's how growth occurs. Resolving to be better than we were yesterday is the best way to help each other. Tomorrow will be happiest if we improve ourselves today, and how we build the future is: together.
Now, you'll have to excuse me, the Island of Equestria from Barbie Horse Adventures needs a groundskeeper. It's not glamourous work, but assisting others is how we'll heal the world around us.


 Essay Pro