Existing User Log In
New User Registration


Register for a free account to gain full access to the VGChartz Network and join our thriving community.


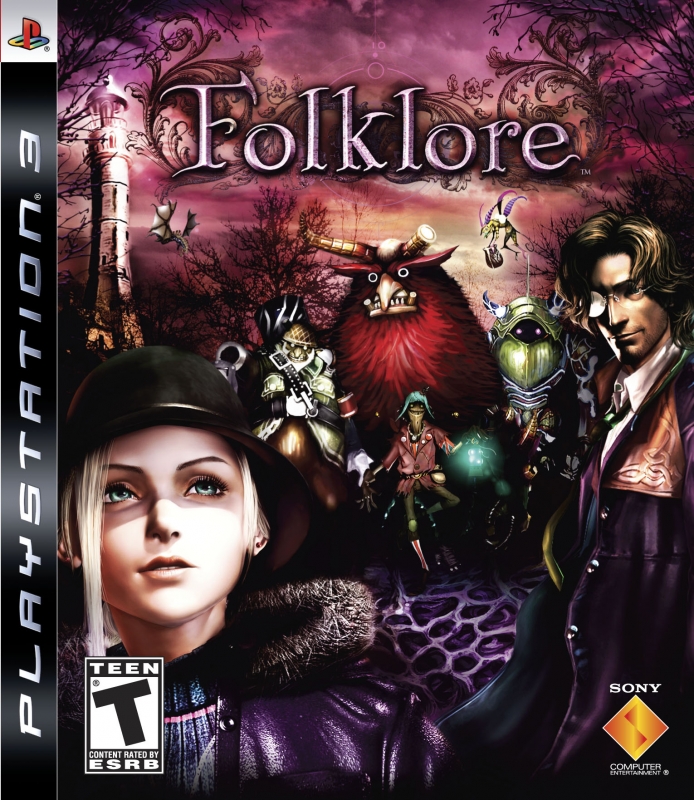
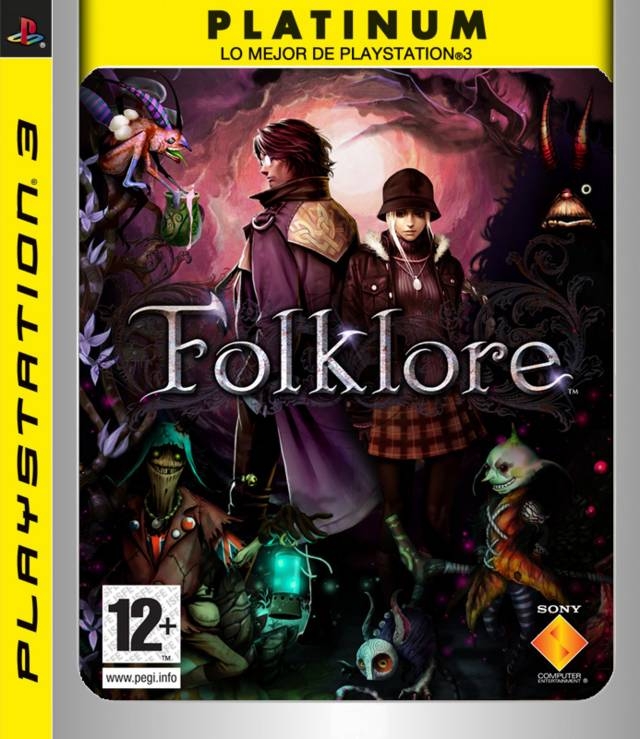
America - Front
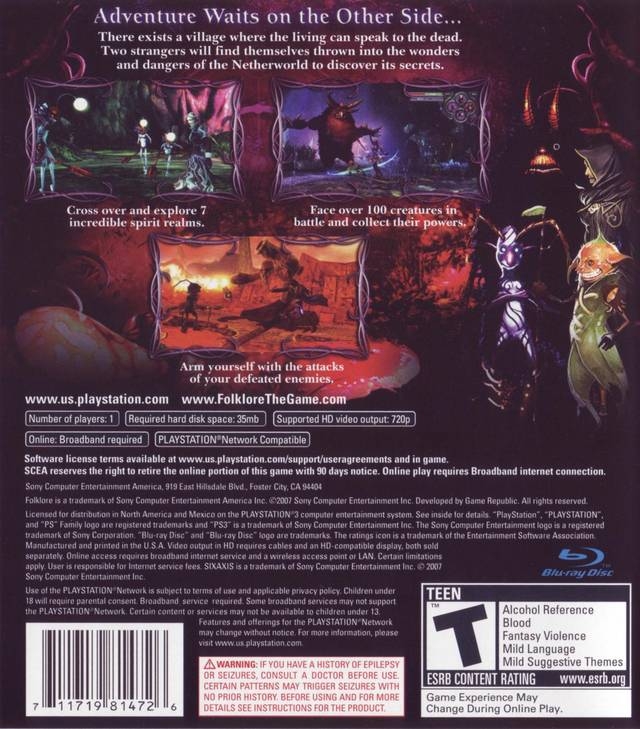
America - Back


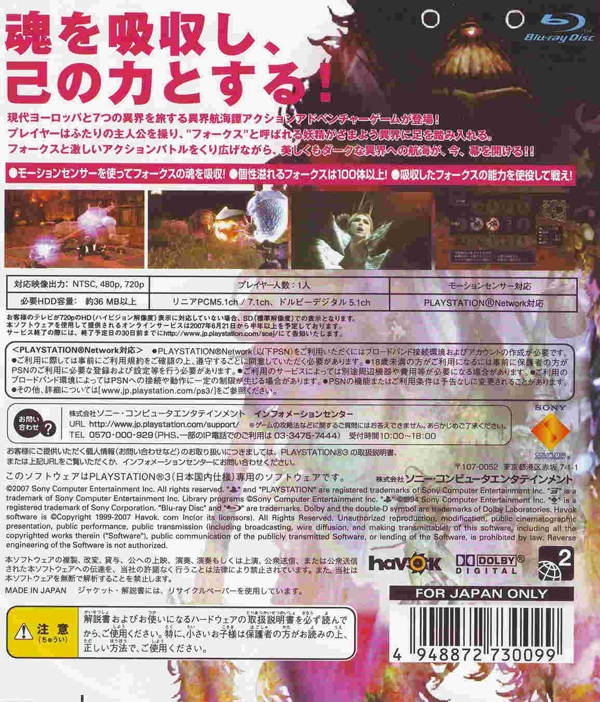
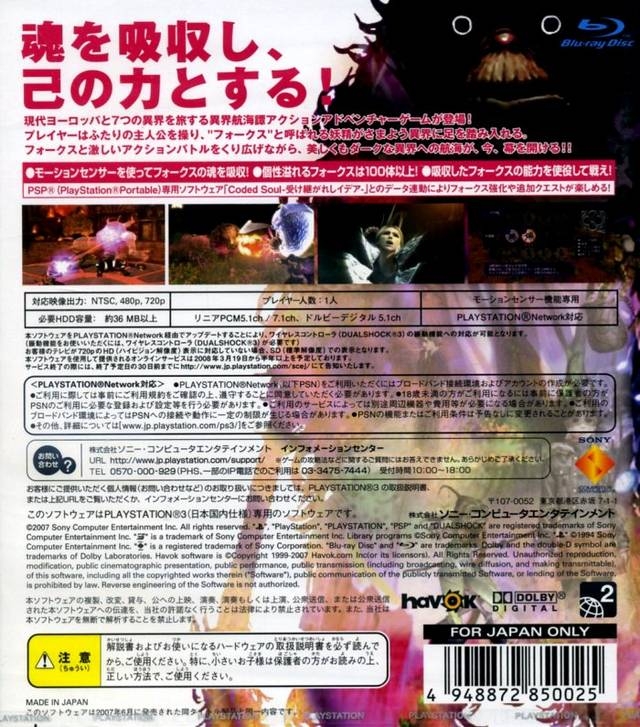
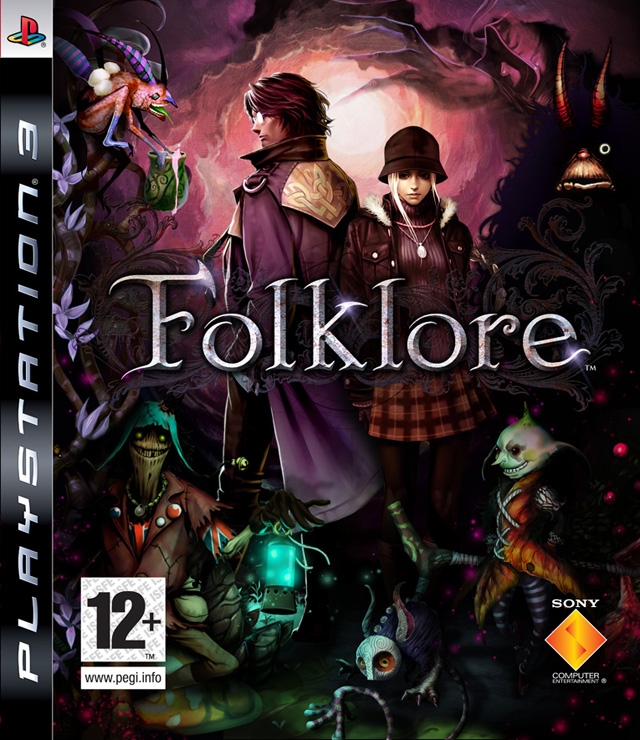
FolksSoul: Ushinawareta Denshou
FolksSoul -失われた伝承-
Game Republic
Role-Playing
 10/09/07 Sony Computer Entertainment
  06/21/07 Sony Computer Entertainment
  10/12/07 Sony Computer Entertainment
| Owners: | 372 | |
| Favorite: | 14 | |
| Tracked: | 2 | |
| Wishlist: | 17 | |
| Now Playing: | 11 | |
Game Introduction
17 years ago, in the town of Doolin Village a legend states that there is a way for the living to communicate/meet with the dead. There are many people who believe this legend but the citizens of this town do not believe there is any truth to this legend.
Ellen finds herself drawn to Doolin Village. One day she receives a letter from her dead mother asking her to come to Doolin. She does not remember much about her past since her mom died when she was very young. She thinks this is the perfect opportunity to find out more about her past.
Keats is a reporter for an occult magazine. One night he gets a mysterious call for help from someone in Doolin Village.
Once they arrive in Doolin they find themselves trying to solve a 17-year old murder in a town where there is more dead then there is living.
Character Biography
Ellen
Ellen is a 22-year-old college student. She lost her mother 17 years ago. She does not remember much about her child hood, let alone her mother. One day she receives a letter from her mother asking her to come to Doolin Village.
Messenger
On the one night a year where you can enter the Netherworld from the henge, Ellen meets the Scarecrow. He informs her that he can help her meet the dead, offering her the chance to meet her mother.
Once she has entered the door to the Netherworld from the henge, she finds a mummy wearing a cloak. The cloak is the key to entering the Netherworld. Ellen takes possession of the cloak or the cloak takes possession of her; given her the powers to be the Netherworld Messenger.
Keats
One night when Keats is working late in the editorial department the phone rings. A woman is on the phone asking him to help her. She tells him that she is in Doolin; he makes his way there.
Guardian
After witnessing Ellen becoming the Netherworld messenger, he finds his self-becoming her guardian.
Scarecrow
Scarecrow is a halflive who helps Ellen.
Livane
Livane is an Ancient Messenger. She is the last of an ancient race that existed before humans.
Faery Lord
The Faery Lord is the savior of the Netherworld.
Belgae
Belgae is an invisible man that helps Keats.
Folk
Folk are the souls of the dead who have not found peace.
Netherworld
The Netherworld is the land of the dead, a place where souls can transform into folks. Many realms make up the Netherworld.
Faery Realm
The Faery Realm is home of folks with strong sleep and bond elements. They keep the people who wonder to the realm from leaving.
Warcadia
Warcadia is an imaginary land made from the fear of death that hunts the human heart.
Undersea City
The Undersea City believed to be the god's home. With people no longer, believing in the gods is causing them to disappear. Now the folks that live here are strong with water and ice.
Endless Corridor
The Endless Corridor is the head quarters for Livane and Belgae. The folks here have strong thunder and earth elements.
Hellrealm
The Hellrealm is made up of the human thoughts for those who have sinned to be punished.
Netherworld Core
The Netherworld Core is the heart of the Netherworld.
Game Basics
Attacking/Defending
Ellen and Keats use folks that they have acquired to attack other folks. There are many different folks to choose from. Some have power attacks, long/short range attacks and some defend. You should try to use them all to get familiar with them.
Palette
Press L2 to get to the palette menu. You can equip up to four folks at a time on their palette. The four folks that you decide to equip are assigned to a button (X, O, Δ, □).
To use the folks that you have assigned press the corresponding button.
Maps
Press SELECT to see the map. You can also find out your current objectives.
Memory Stones
Memory stones are mysterious crystals that are scattered all over the Netherworld.
Cloaks
Ellen can get many different cloaks as you go to new realms in the Netherworld. The different cloaks give her different abilities.
Trancension
Keats has the ability to trancension. Press L3 and R3 when your TP Gauge is full.
Element Attacks
Some of the folks have element such as fire, ice, thunder, slash and water.
Absorbing Ids
Attack the folks until their Ids turn Red. Once it is red press R1 and move the controller up. If the folks Id is blue it means it is still putting up a fight.
Barriers
If a barrier is green then it is temporary. You will either have to defeat or absorb all the folks in the area. Purple barriers are off limits… meaning there are still some things that you have to do before you are allowed to pass.
Karma Release
These items can be found in Memory Stones and are dropped by enemies.
|
Cold Tree Nut |
a nut that feels cold |
|
Warm Tree Nut |
a nut that feels warm |
|
Pulse Tree Nut |
a nut that pulsates |
|
Purple Dust |
dusk with an intoxicating smell |
|
Yellow Dust |
yellow dust |
|
Green Dust |
dust with a sweet smell |
|
Green Ore |
green and mottled orange ore |
|
Golden Ore |
an ore with gold glitter |
|
Green Quartz |
quartz with pale green shine |
|
Emerald |
jewel with jade color |
|
Ruby |
glows a crimson color |
|
Purple Stone |
cold purple stone |
|
Yellow Stone |
warm yellow stone |
|
Green Liquid |
a clear green liquid |
|
Aqua Liquid |
aqua liquid |
|
Purple Liquid |
purple liquid |
|
Red Liquid |
red liquid |
Prologue
Ellen: A Strange Death in a Strange Land
Her mother will fall off the cliff. We need to go to the beach to help her. Take the northeastern path to get to Dwarf Beach. Go west over to the canoes for a cut scene. You will awaken in your hut. A voice will tell you to go to the Pub.
Exit your hut and head east. Once you reached the road head north. The Pub will be on the right side. It is a large building with lights in every window. There is also a sign that says "The Bridge House". Go there for another scene.
Once you enter the Pub, you will see that everyone is a halflive. Meaning they are not dead but they are not alive. After this scene, you will be told to go outside and talk to the Scarecrow.
After talking with the Scarecrow, he will tell you to go to the henge. The henge is located south of the village. Once you get to this part, everything is straightforward. Just keep going straight. Eventually you will go through a tutorial.
Keats: Covering a String of Murders
While Keats is sleeping, a voice will tell you to go to the Pub. Exit your room and head west to get to the pub. When you reach the main road, you want to head north. The pub will be on your right. When you reach the pub, you will have a cut scene. After the scene enter the pub and there will be another scene. After this scene, exit the pub and you will talk to Belgae. He will tell you to go to the henge. The henge is located south of the village. Once you get to this part, everything is straightforward. Just keep going straight. Eventually you will go through a tutorial.
Chapter 1
Ellen: Familial Warmth
Check List:
Folks:
|
Bargest |
Boobrie |
Browney |
|
Bug-A-Boo |
Cait Sidhe |
Daru |
|
Henky |
Impet |
Killmoulis |
|
Ogma |
Pouke |
Shefro |
When you wake up, you will be in your hut. We need to go to Suzette's house. Leave your hut, head east and then north. There is house on the right. It is across the street from your hut. Suzette will give you the Memento Key. The key will allow you to enter the Faery Realm at night. Go back to your hut, go to your bed and choose to rest.
When you wake up go to the desk and save your game. Exit the hut and head south to the henge. There will be a glowing stone in the center. You will have to give the memento key as an offering.
When you enter, the Faery Realm, Scarecrow will give you a Faery Realm Picture Book Page 1. Talk to the Faerys in this area to find out more about what is going on. When you ready, go north to the next area and then go east. In this area, there will be some Henkys. There are also six memory stones here. For the memory stones in the air, you will need to use Henky.
Note - you will need Boobrie Id, he has wind as an element, to break the green stones. Therefore, we will have to come back.
Go back to the previous area and continue north. Keep going north until you reach a large tree. Go around the tree and head to the next area. In this area, you will have to fight a new folk named Impet. Be careful around Impet. He drops some sticky stuff called mucous. If that happens to you just rotate the left stick. You will need to use Henky Id to defeat Impet so you can absorb him.
Road of Daru
Continue east, then north and there will be Faerys in this area. You can talk to them if you want. When you are ready, head north to the exit. There is a barrier in this area. You will need to absorb Boobrie in order to have the barrier removed. Use Killmoulis (the shield) and Pouke to attack him.
You will have to use time absorption to absorb Boobrie. Basically when his Id is red hold R1. Wait for his Id to go red again and then shake your controller up while holding R1. When his Id is not red just hold R1.
Once you have the Boobrie Id equip it to your Palette. Break the memory stones in this area for health.
Note - You can now go back to where the green memory stones are (towards the beginning of the Netherworld) and break them for the Faery Cloak and Faery Realm Book Page 2 or you can wait until we go on our first quest. The choice is yours but for this walkthrough, we will wait until the quest.
Go east up the hill and break the green memory stones. You will see two Cait Sidhes. They will run away if you attack them. Take the eastern path. In this area, you will fight Henky, Impet and some Poukes.
When you are ready head east and then north there are more Impets here. Go back southwest and then north there are some memory stones here. When you are done continue north until you see a sleeping Bug-a-boo. When you get close to him, he will stand up and start attacking you. When he feels like his life is threatened, his fur will spike out. When this happens, you will need to attack him from afar. Once you defeat him, you will get Faery Realm Book Page 3. Go east to the next area and then go north to the next area.
There are some Faerys in this area. Down the path, there will be a little boy named Herve. Talk to him. Head west after you finish talking to him and you will have to fight two Darus. Once they are defeated, break the memory stones and exit the area.
Go back to where you meet Herve and go north. Then head west and bear south. Continue to the next area. Here you will have to fight Ogma. You will need to use Boobrie to defeat him. Once you are ready head southwest here will be a memory stone containing Faery Picture Book 4. Continue west. After you fight Darus, continue to the north and then take the eastern path. In this area, you will have to fight Bargest. MAKE SURE THAT YOU HAVE EQUIPPED OGMA TO YOUR PALETTE. You will need him to defeat Bargest. Bargest is a time absorption.
After you defeat him, head east. In this area, you will meet up with Scarecrow. He will tell us to go see the Faery Lord but instead we are going to use the glowing flower to go back to Doolin. Once in Doolin go to your hut, rest and then go to the pub. Once in the pub talk to Ganconer and choose quests. He will tell you that the quest you have available is the Gig. Accept the quest.
Quest: The Gig: Help Charlie, a famous saxophonist, hold a concert.
You will automatically be back at the Faery Realm. Talk to the Scarecrow, Frizzie, and then talk to Charlie. He will ask you for a reed made of Faery Wood. Head north to the next area and then head east. Break the memory stones here and you will get Faery Realm Book Page 2 (if you did not get it earlier. It will be in one of the floating memory stones. Once you have it head west and north to the next area. Keep going north and you will see a Faery standing near a big tree. He will give you the Faery Reed. Then head south back to Charlie and talk to him.
Reward: two Green Quartz Stones
If you go back to the Pub and talk to Ganconer again you can do the Bargest quest.
Quest: Bargest: Kill 3 Bargest
Talk to Ganconer again and choose the Netherworld Walk quest.
Quest: Netherworld Walk – Defeat the folks in the training ground that Scarecrow created within the time limit
Note: I have also listed this quest in Chapter 2. I found that the Warcadia folks will help you get through this within the time limit.
Talk to Scarecrow and the two faerys (if you like). Once you talked to the Faerys (if you decided too), talk to Scarecrow again and select "yes, I am ready".
First round: 1 minute to defeat Pouke and Killmoulis
Talk to Scarecrow again to start the third round.
Second round: 2 minutes to defeat Pouke, Killmoulis and Hinky - Don't absorb Killimoulis (if you do the folks you defeated already will come back). So, keep attacking him even when his Id is red.
Talk to Scarecrow again to start the third round.
Third round: 2 minutes to defeat Killmoulis, Daru, Ogma and Impet (sorry I don't remember if Pouke and Hinky where there). - Don't absorb Impet. Once his Id is red keep attacking him.
Fourth round: 2 minutes to defeat Boobrie, Daru, Ogma, Impet, Killmoulis (sorry I don't remember if Pouke and Hinky where there).
Reward: Six Pulse Tree Nuts (if you fail to complete all four rounds)
Six Pulse Tree Nuts and Three Yellow Stones (if you pass all four rounds)
Once in the Faery Realm go north and keep going north. You will eventually come to an area where you can go either northwest or northeast. Go northeast. You will be in an open field and Bargest will appear. Once you defeat him 2 more will appear. Defeat both of them and you will automatically go back to the pub.
Reward: three Pulse Tree Nuts, three Warm Tree Nuts and three Cold Tree Nuts
To get back to the Faery Realm you will have to go to your hut and rest. When you wake up it will be nighttime. Exit your hut head east and then north at the main road. You will come to a fork in the road, take the left path. You will see a big glowing blob of light. Go to that light and choose to enter the Netherworld.
Go back to where you last seen the Scarecrow. Talk to him again and then try to go west. He will tell you to go see the Faery Lord first. Go north up the laughing stairs. Inside the building, you will meet the Faery Lord. After the cut scene, he will give you Faery Realm Picture Book Page 5. Exit the building and head south and then west to the path that the Scarecrow would not let you take before. In this area, you will have to fight a group of Killmoulis. They will be dancing in a circle. Kill them all so the fourth memory stone will appear. Once you have killed all the Killmoulis and broken all the memory stones, adjust your palette. Take the north exit. Time to fight Cernunnos.
Boss: Cernunnos
Palette:
Bargest - Tentacles
Ogma - Spikes
Killmoulis - Shield
Boobrie - Flower
Cernunnos is time absorption.
Strategy 1: When the tentacles begin sucking things up; use Bargest we want the tentacle to suck him up so he can attack the tentacle from the inside while you attack the tentacle from the outside. Repeat this until both tentacles are gone. Once the tentacles are gone, Cernunnos will collapse into the ground and a flower will come up. Use Boobrie on the flower and Ogma on the spikes.
Strategy 2: When the tentacles begin sucking things up; use Bargest we want the tentacle to suck him up so he can attack the tentacle from the inside while you attack the tentacle from the outside. Repeat this until both tentacles are gone. Once the tentacles are gone, Cernunnos will collapse into the ground and a flower will come up. Use Boobrie to attack the flower. When the flower is about to spit a seed use Killmoulis to block it. You will know when the flower is going to spit a seed out because it crunches down and then lurches upward.
Once Cernunnos is defeated, there will be many cut scenes. When the scenes are over, you will be back in the Faery Realm talk to Scarecrow. Scarecrow will tell you to go back to the village. Use the glowing flower to teleport back to Doolin. Once in Doolin go directly to Suzette's house.
After the cut scene, go to Dwarf beach and head west past the canoes. There will be another scene.
Keats: Mirage
Check list:
Folks:
|
Andraste |
Bargest |
Bug-A-Boo |
|
Hinky-Punk |
Killmoulis |
Ogma |
|
Pouke |
Poury |
Treant |
Keats start off in the pub and decides that he should go speak to Suzette. Exit the bar and head south to her house. Once in her house there will be a cut scene. Suzette will let you borrow the picture.
After the cut scene leave her house and go to Ellen's hut. It is right across the street from Suzette's house. You will meet Ellen outside her hut for another scene. After the cut scene go to your base… it is east of the Pub and rest.
When you wake up, exit your base, head west and then south to the henge. At the henge, you will meet Belgae. He will tell you to place the picture on the pedestal so you can enter the Faery Realm.
When you enter the Faery Realm, Belgae will give you Faery Realm Picture Book 1. Head north to the next area, then head south and you will have to fight Treant. Once you absorb him, equip him to your palette. Break open the memory stones for Faery Realm Picture Book Page 2. Go north, then east and then north to the next area. In this area, there are Faerys for you to talk too. Once you are done head north.
You will see Poury in this area. Use Pouke to take care of him. Go northeast to the next area. You can talk to the Faerys in this area if you want. Continue to the next area.
You will have to fight a flying Ladybug folk. Use Treants to fight it. When she is on her back really put it on her using Pouke. If she starts chasing you, use Killmoulis (the shield). Once her Id turns red, you will have to use time absorption. After you, absorb her; equip her to your palette, head north and then east to the next area.
In this area, you will have to fight Killmoulis and Poury. After the fight head northeast to the next area and you will see three water memory stones to the west. You cannot break them so continue to the next area.
In this area, you will have quite a few Poukes to defeat. Use Andraste to kill them off quickly. Continue to the next area. Talk to the Faerys in this area. The Faery will tell you that you have some quests to do back in Doolin. So, let us go back to Doolin to do this quest. There is a glowing flower across from the Faery. Go to that flower and select Doolin from the list.
Once in Doolin go to your base, rest and go to the Pub. Once in the pub talk to Ganconer and select quest. The quest that you have available is The Gift; except the quest.
Quest: The Gift - Check the perfect gift bought by Renaldo before his death.
You will be back at the entrance to the Faery Realm. Head north and talk to every halflive and Faery that you see. Continue north until you reach the big tree. On your way to the tree, make sure you talk to every halflive and Faery. You will see Renaldo. Make sure talk to him and then continue going north until you reach the Road to Daru. Go to the bridge and talk to Herve. After that head south and you will have a scene with Herve and Renaldo.
Reward: five Golden Ore, five Green Ore and five Green Quartz Stones
Talk to Ganconer again and select downloaded quest. The quest that you will have available is Netherworld Walk; except the quest.
Quest: Netherworld Walk – Belgae has created a battle training ground.
Note – I was unable to beat this quest in this chapter so I am going to list this quest again in Chapter 2. The Warcadia folks can defeat the folks from the Faery Realm faster.
Talk to Belgae and he will tell you about the training ground. You can either talk to him again to start the first round or you can talk to the two faerys for more information about the folks that you will be fighting. If you choose to talk to the faerys talk to Belgae when you are done to start the first round.
First round – 2 minutes to defeat Pouke (once you defeat the first group another group will appear)
Once you defeat Pouke, use the glowing flower to restore your health and then talk to Belgae again.
Second round – What ever time you had left from fighting Pouke to defeat Killimoulis and Poury. (If you absorb Killimoulis it takes time away from you so just defeat him. If you absorb Poury it gives time to you so make sure absorb Poury.)
Third round – Whatever time you had left from the second round to defeat Pouke, Poury and Killimoulis. (If you absorb Killimoulis it takes time away from you so just defeat him. If you absorb Poury or Pouke it gives time to you so make sure absorb Poury or Pouke.)
Reward: If fail to win the second round – 2 Pulse Tree Nuts
If you fail to win the third round – 4 Pulse Tree Nuts
If you win the third round – 6 Pulse Tree Nut, 1 Yellow Stone and 1 Ruby
After you complete the quest, you will have a cut scene at the Pub. After the scene go to your base, save and rest. It will be nighttime when you wake up. Exit your base and head south and then north at the main road by the Pub. You will come to a fork in the road take the left path. You will see a big glowing light in the road. Go to the light to enter the Faery Realm.
You will be at the beginning of the Faery Realm. Go back to the Road to Daru; head north for a scene with Livane and Belgae. Livane gives you Faery Realm Picture Book Page 5. Head west after the scene you will have to fight two Treants and three Killmoulis. After you defeat them, break the memory stones for Faery Realm Picture Book Page 3.
Go back east and then go north to the Gesh Forest. In this area, there is a white memory stone, break it for Faery Realm Picture Book Page 4; then head southwest. In this area, there will be two Hinky-Punks to fight. After you, defeat them head west. There will be three red memory stones; use Hinky-Punk to break them. Take the north path to exit this area. In the new area, we will have to fight Bargest. You will need to use Hinky-Punk to beat him.
Once he is defeated, continue north to the next area. There will be some Faerys to talk too. You will not be able to enter the Faery Lord's hall. So head northwest instead. In this area, you will have to fight some dancing Poukes. Once you defeat them, break the red memory stone and head north to fight Cernunnos.
Boss: Cernunnos
Palette:
Bargest - Head
Hinky-Punk - Flower
Killmoulis - Shield
Cernunnos is time absorption.
Attack the head of Cernunnos using Bargest until it collapses. When the flower appears, attack it with Hinky-Punk and defend with Killmoulis when it shoots a side at you.
Once you defeat him, you will have a couple of cut scenes. When you are done, Keats will return to the Faery Realm and speaks with Belgae. After the conversation with Belgae, Keats returns to Doolin. Once in Doolin go to Suzette's house.
Chapter 2
Ellen: Only One Wish
Check List:
Folks:
|
Ambush |
Barrager |
Bullseye |
|
Degasser |
Ga-Boi |
Gargantua |
|
Hawk |
Patriot |
Warthog |
Exit your hut and head south. There is a man named O'Connell there. Talk to him. When you are done, go to Suzette's house and talk with her. Then go to Harriet's house. Harriet will give you a torn picture that belonged to Ryan. She also tells you to go visit the hut on a cape to the north. Off we go.
Exit her house and head northwest. When you come to the fork in the road, take the right side. You will come up to a house; Keats is waiting there for you. There will be a cut scene and you will learn that he has the other half of the photo. He will ask you if he can borrow the photo until tomorrow. Tell him yes. Keats now has Ryan's memento. You will have a choice to either wait in your room for the night or explore a bit. Choose to rest.
Note 1 - If you decide not to give Keats the photo then go to you to your hut and rest. When you wake up go to the henge and offer the photo. Leave and you will run into Keats. Then you both will automatically go to the church and eventually you will be in Warcadia.
Note 2 – If you choose to explore a bit…when you are done exploring go to your hut and rest.
When you wake up go to the henge. You will find Keats on your way there. You both will go to the church for some more cut scenes. After the cut scenes, we will be in the Warcadia World with Scarecrow. There will be another scene.
There is a glowing flower behind you if you want to save your game. Head north. There will be some Faerys along the way make sure you talk to them. The last one that you will talk to is Bogle, when you are done with that head north.
Here there will be three Hawks to fight. After the fight, head north you will have to fight four more Hawks. There are two memory stones on the eastern side of this area. One of them gives you health and the other gives you three more Hawks to fight. Take the northwest exit. There will be more Hawks to fight; there is also a memory stone here. Continue going north there will be a crap load of Hawks, Barrager and Bullseyes to fight as well as another memory stone. When you are done take the eastern exit.
Break the memory stones for some health and to fight four Hawks and one Bullseye, when you are done head south. There will be four Hawks to fight and two memory stones. Go down the stairs, make a right, go up the stairs and make another right for another memory stone with Warcadia Picture Book Page 1.
Take the west exit. We will be back in the courtyard. If you want to save (which I recommend that you do) before fighting Degasser, go south back to the glowing flower. Take the northwest exit and take the northwest exit again.
There is a Degasser here and you will need to equip your Warcadia folks to your palette to defeat him. You will need to attack him from afar.
Degasser is a Beat Absorption. When his Id is red press, hold R1 and tilt the controller left to right and right to left. Once you have beaten him you will have to move the controller up. I recommend pushing R3 to use the tutorial (this will only work if you have the tutorials turned on).
A memory stone will appear once you absorb him. It will contain Warcadia Picture Book Page 3. Take the north exit. Here you will meet up with Scarecrow again. There are some Faerys and a glowing flower here.
Take the southeast exit. You will need to fight Degasser three more times to get his full power. When you are done with that go north to the next area, equip Degasser to you palette and take the eastern exit. Ga-Boi will be in this area. Use Degasser to fight him. You will have to fight him three times. After you defeat him, he will reappear. Once you defeat him, 4 times equip him to your palette and then break open the memory stones with him for Warcadia Picture Book Page 2. After you break this stone, another Ga-Boi will come out and fight you. Then take the northern exit.
In this area, you will have to fight some Warthog and a flying folk. Use Ga-Boi and Degasser to fight them. The flying folk will also try and drop bombs on you… like 3 to 4 of them in a row. Once the flying folk is defeated, a group of Hawks and a Warthog will attack you. Once you defeat them, head north across the bridge and then south for another memory stone. Once you break the memory stone, another group of Hawks will attack you from behind; use Ga-Boi to attack them. One hit from him stuns them and the next 1 to 2 will finish them off. When you are done go back across the bridge and take the southern exit. In this area, you can talk some faerys too. In addition, there is a glowing flower to the south. When you are done take the west exit.
Break the memory stone in front of you. Go forward and you will have to fight two Ga-Bois and one Patriot. There are three memory stones here but you cannot break them yet. When you are done take the eastern exit, then head north, crossover the bridge and head west.
There will be three mines on the ground. They are the three red circles. Use Hawk to blow them up. Then three Ambush folks will come out to put three more bombs down. Use Ga-Boi to kill the Ambush party that came out and put the new bombs down. You will have to repeat this process 3 times. After the third time a memory stone will appear behind you; break it for Warcadia Picture Book Page 4. Also, break the other two memory stones ahead of you.
Go back east, then north to the new area and break the memory stone in front of you. Equip your palette with Ambush and Ga-Boi. In this area, you will have to fight Gargantua.
A strategy for fighting Gargantua - use the Ambush Id to lay mines down in his path and use Ga-Bois to attack him.
Once you are done head north to find Fort Avalon. Speak to the Faerys in this area and use the glowing flower to return to Doolin. Go to your hut, rest, then go to the pub and talk to Ganconer. It is time for a quest.
Quest: Bullseye's Defection - Guard Bullseye and go to the entrance Warcadia
Note: He will not always move when you do. Just keep going make sure you kill all the folks and he will eventually catch up. There will be some barriers blocking your way… the key to getting the barrier to disappear is to defeat all the folks in that area.
Talk to Bullseye and then head south to the next area, go south again to the next area and south again to the next area. In this area, head east to the next area and then south to the next area. Then go west to the next area and then head south. You should now be at the beginning of Warcadia.
Reward: Battlefield Cloak
Talk to Ganconer again. This time select downloaded quest, choose the Netherworld Walk and accept the quest.
Quest: Netherworld Walk – Defeat the folks in the training ground that Scarecrow created within the time limit
Note: If you beat this quest in Chapter 1 please skip it here!
Talk to Scarecrow and the two faerys (if you like). Once you talked to the Faerys (if you decided too), talk to Scarecrow again and select "yes, I am ready".
First round: 1 minute to defeat Pouke and Killmoulis
Talk to Scarecrow again to start the third round.
Second round: 2 minutes to defeat Pouke, Killmoulis and Hinky - Don't absorb Killimoulis (if you do the folks you defeated already will come back). So, keep attacking him even when his Id is red.
Talk to Scarecrow again to start the third round.
Third round: 2 minutes to defeat Killmoulis, Daru, Ogma and Impet (sorry I don't remember if Pouke and Hinky where there). - Don't absorb Impet. Once his Id is red keep attacking him.
Fourth round: 2 minutes to defeat Boobrie, Daru, Ogma, Impet, Killmoulis (sorry I don't remember if Pouke and Hinky where there).
Reward: Six Pulse Tree Nuts (if you fail to complete all four rounds)
Six Pulse Tree Nuts and Three Yellow Stones (if you pass all four rounds)
Exit the pub and go east. Go past Keats base to the cemetery/church bear right and follow the path until you see a fire color blob. Go up to it to be teleported back to Warcadia.
Once in Warcadia go back to the Fort Avalon (go north, northwest, north, north, north, north and north again or use the glowing flower to teleport to Fort Avalon). Make sure that you have Degasser, Ga-Boi and Boobrie on your palette. Enter the door at Fort Avalon. Use Boobrie Id to break the memory stones. You will have two large groups of folks to fight. Degasser and Ga-Boi will take care of them in no time. Use Boobrie to break the memory stones; you will get some health and Warcadia Picture Book Page 5. Head north to fight Dreadnought.
Boss: Dreadnought
Palette-
Ga-Boi - Rear
Gargantua - Legs
Degasser - Mouth and Unarmed Legs
Dreadnought is a time absorption and beat absorption.
Strategy 1 - When Dreadnought begins leaking fluid from his back get behind it and use Ga-Boi. The back will turn red to let you know you no longer need to attack it. Now focus on the legs with Gargantua. Once all four legs are red, attack his head.
Strategy 2 - Try to get between Dreadnought's gun and his backside. Use Ga-Boi to attack either one (the gun or the can looking thing that is leaking liquid). When you see his backside move up; run. Once he puts it down again start attacking it again. Keep doing this until it blows up.
Now we need to move to his legs, attack them using Gargantua. Keep shooting them until they turn red. Once he starts dragging or falling over the leg that you were attacking move to the next one. Once all four legs are red, keep shooting any of them until he will just fall over and does not get up.
Run over to his head and attack it with Degasser until he starts to get up. You will know when he is going to get up because he will shoot fire out of his mouth. When this happens, start attacking his legs with Gargantua until he falls again. Keep repeating this process until his Id turns red.
Follow the first two paragraph of strategy 2.
When he falls and his mouth opens, shock him once with Ga-Boi. Then hit him with degasser. This makes it possible to charge degasser or just hit him around 3-4 times.
Tip - When doing the beat absorption do it as fast as you can. You will lose your absorption and he will come back to life.
Once you defeat him, you will have some cut scenes; after that scene talk to Ryan for another scene. Head south of the glowing flower, talk to Bogle, then go north to the glowing flower and teleport back to Doolin.
Once in Doolin go to Harriet's house and talk to her. She will refuse to go to the church with you. So, try to leave her house and she will change her mind. Now take the west exit.
Keats: Lamplight
Check List:
Folks:
|
Barrager |
Brummbear |
Bullseye |
|
Ga-Dearg |
Gargantua |
Hawk |
|
Patriot |
Volcano |
/////////// |
Exit your base, go west and talk to Mrs. Lester; she is standing outside the house on your right. Then go to Harriet's house. After the conversation go to the Pub and talk to the Pub Master. After the conversation exit the pub and head north and then northeast. Enter the hut. In this room go over by the cabinet and you will see a glowing light coming from the bottom part of it. Search it to find a half of a photo.
As you are leaving the hut, a scene will appear with Keats and Ellen. When you have the chance, choose to rest. When you wake, you will automatically be at the henge. Offer the placed together photo to the henge. Leave and you will run into Ellen for another scene.
Note - If you choose not to give Keats the photo then when you wake up leave your base and head towards the henge and you will meet Ellen.
After the scene, you will be at the church and then Warcadia with Belgae. Go north and talk to all the Faerys and the Rebel Denizens. Continue north after you have talked to everyone. Fight the Hawks and absorb their Ids. Go up the stairs to find more hawks. Go northwest to the next area. Here you will have to fight several Hawks and Barragers. There will be two memory stones for you to break. To break the red memory stones use Hinky-Punk. Take the eastern exit.
Here you will have to fight five folks defeat them and head southwest. Defeat the folks in this area and use Bargest to break the memory stones or you can climb up the stairs and use a long-range folk to break the memory stones. Now we need to go back to the northern path. You can either backtrack (north and then northeast) or go around (take the western exit, then southwest and northwest) Head north to fight Volcano.
Volcano does not fight alone. He has Hawks to help him out in addition to his explosives and flame thrower.
Note - When fighting Volcano, take out the folks first using Bargest. By using him, the folks will be defeated in two hits. Once the folks are gone, get as close to Volcano as you can and use Pouke to attack him.
Once Volcano is defeated head north for a conversation with Livane and when you are done talking to her use the glowing flower to go back to Doolin. Go to your base and rest. When you wake up; go to the pub and talk to the Ganconer. Time for a quest!
Quest: Shield Wall - Defeat the machine soldiers with Bullseye (working as a team with the Bullseye).
You will start talking to Bullseye. We need to fight every machine that we come across. Here are the directions to the areas where the machines are. Starting from where you met Bullseye go north, northeast, northeast and then northeast. You will fight machines in every one of these areas.
Note - If Bullseye dies then you will restart where you first met him. You will not have to fight any machines in the areas that you have already cleared.
Tip - Be careful when you are absorbing… you can absorb Bullseye.
Reward: two Yellow Dust Stones
Talk to Ganconer again and choose the Shield quest again.
Quest: Shield Wall (again) - Defeat the machine soldiers with Bullseye (working as a team with the Bullseye).
Talk to Ganconer yet again and this time choose the Netherworld Walk quest.
Quest: Netherworld Walk – Belgae has created a battle training ground.
Note – If you were able to beat this quest in Chapter 1, please skip it here.
Talk to Belgae and he will tell you about the training ground. You can either talk to him again to start the first round or you can talk to the two faerys for more information about the folks that you will be fighting. If you choose to talk to the faerys talk to Belgae when you are done to start the first round.
First round – 2 minutes to defeat Pouke (once you defeat the first group another group will appear)
Once you defeat Pouke, use the glowing flower to restore your health and then talk to Belgae again.
Second round – What ever time you had left from fighting Pouke to defeat Killimoulis and Poury. (If you absorb Killimoulis it takes time away from you so just defeat him. If you absorb Poury it gives time to you so make sure absorb Poury.)
Third round – Whatever time you had left from the second round to defeat Pouke, Poury and Killimoulis. (If you absorb Killimoulis it takes time away from you so just defeat him. If you absorb Poury or Pouke it gives time to you so make sure absorb Poury or Pouke.)
Reward: If fail to win the second round – 2 Pulse Tree Nuts
If you fail to win the third round – 4 Pulse Tree Nuts
If you win the third round – 6 Pulse Tree Nut, 1 Yellow Stone and 1 Ruby
You will start off talking to Bullseye. We need to fight every machine that we come across. Here are the directions to the areas where the machines are. Starting from where you met Bullseye go north, northeast, northeast and then northeast. You will fight machines in every one of these areas.
Note - If Bullseye dies then you will restart where you first met him. You will not have to fight any machines in the areas that you have already cleared.
Tip - Be careful when you are absorbing… you can absorb Bullseye.
Reward: two Pulse Tree Nut, two Golden Ore and two Green Dust Stones
Exit the pub and go east. Go past Keats base to the cemetery/church bear right and follow the path until you see a fire color blob. Go up to it to be teleported back to Warcadia.
Now that we are back in Warcadia, we need to go back to where we last meet Livane. Go north, northwest, northwest and then north. Head east from the save point crossing over the bridge. Once you defeat the Ga-Deargs in this area; will cause more folks to appear. The memory stone located on the southeastern corner (go north and then southeast) has Warcadia Picture Book Page 1. Take the northwestern exit. Once you get close to the exit, two more Ga-Deargs will appear.
In this area, you will have to fight Brummbear who is surrounded by Hawks.
I am going to mention this but we are not going there yet. If you take the south exit and then the western exit, you will be in an area with many memory stones. One of the memory stones has a Warcadia Picture Book Page in it. We will not be able to enter here until we get an Id that has an ice element.
Head north and cross the bridge. Here you will have a bunch of folks to fight. Head west and you will have to fight three more Patriots. Once they have been defeated, a memory stone will appear. Break it for Warcadia Picture Book Page 4.
Go back east and then head north to fight Gargantuan. Use Brummbear to defeat it.
Tip - Attacking Gargantuan from behind or on his side but be careful not let him run you over.
After you defeat him, go north. Head up the stairs and talk to Livane. Also, talk to everyone on the steps. Do not go through the doors to Fort Avalon instead use the glowing flower to go back to Doolin. Go to your base and rest. Go to the pub and talk to Ganconer. Quest time!
Quest: Bullseye's Request - Defeat Brummbear using Warcadia soldiers only.
Reward: three Golden Ore, three Green Ore and three Green Quartz Stones
Exit the pub and go east. Go past Keats base to the cemetery/church bear right and follow the path until you see a fire color blob. Go up to it to be teleported back to Warcadia.
Once in Warcadia head north, northwest, north, north, north and north again. We are now at the entrance door to Fort Avalon. Save your game and then enter the door to Fort Avalon.
Here you will have to fight three Hawks and three Ga-Deargs. Once you defeat them, head north and there will be nine Hawks behind the red memory stones. Use Hinky-Punk to break the red memory stones. Be careful because four Ga-Deargs and seven Hawks will drop down out of the sky and attack you.
Defeat them and break the three memory stones for some health and Warcadia Picture Book Page 5. Enter the Door to the north to fight Dreadnought.
Boss: Dreadnought
Palette:
Volcano - Rear
Brummbear - Legs
Hawk - Legs
Ga-Deargs - Mouth
Dreadnought is a time and beat absorption.
Strategy 1-
Run behind Dreadnought and when it is leaking use Volcano to damage it. Once it is damaged use Brummbear to attack the legs. Once the armor is off the legs, use Hawk to attack the unarmored legs. Once Dreadnought is down, use Ga-Dearg to attack the mouth.
Strategy 2-
Use Volcano to attack the back of Dreadnought. The back is that can looking thing that is leaking fluid. Keep attacking it with Volcano until it blows up.
Now we need to move to the legs. Use Brummbear to shoot at them. Keep shooting that leg until it turns red. Once this happens move to one of the other legs. Keep doing this until all legs are red and he falls over.
Now use Ga-Dearg to attack his mouth. When he is about to get up he will shoot fire out of his mouth. When he starts to get back up, use Brummbear to attack his legs again. Keep repeating this until he is defeated.
After you have defeated Dreadnought, you will have a scene with Belgae, Livane and Ryan. After the scenes, use the glowing flower to return to Doolin and head to Harriet's house.
Chapter 3
Ellen: Youth
Check List:
Folks:
|
Alraune |
Ascidia |
Asrai |
|
Cu Sidhe |
Dracae |
Fraxinus |
|
Hobbledy |
Malabaricus |
Peg Powler |
Exit Ellen's hut and go to Dr. Lester's house. When you enter the house you will see that Keats is here talking to Dr. Lester. Dr. Lester will ask Keats to come back tonight. Dr. Lester and Ellen will have a conversation. When the conversation is over leave the house; outside you will have a conversation with Mrs. Lester. Mrs. Lester will tell you that she can tell you what happened 17 years ago if you two talk in Ellen's hut.
Once the conversation with Mrs. Lester is over we need to go to the entrance to the Faery Realm. Exit your hut head east and then north at the main road. When you come to the fork in the road take the left path and you will see a glowing blob thing. Ellen will enter the door it will take you back to the place where you first met the deer head. Ellen will ask the head to bring Herve. The deer head is shocked and bring Cecilia instead.
Cecilia tells Ellen that Herve has gone to the bottom of the sea and that she need to get the treasure that they (Cecilia and Herve) left under the Ash tree.
Exit the Pub and you will be in Gesh Forest. Go forward until you see a scene with Dr. Lester. After that scene, we will be back in Doolin, head south to the next area for a scene. After the scene head north, when you come to the fork in the road take the right path to get the hut near the lighthouse. Once you reach the hut search the tree on the left side for medical records and Cecilia's picture. You will then be given the choice to "Head to the alter at night" or "Continue exploring". Choose the first option to head to the alter at night.
You will automatically be at the henge. Go to the alter and offer the medical records. Nothing will happen. Then offer the Cecilia's Picture; Keats will appear. After the scene, we will travel to a new realm in the Netherworld.
We are now in the Undersea City. The area that we are currently in is Old Capitol. After the scene with Scarecrow follow the path and speak to the Faerys along the way. The last person that we will talk to is the Faery Lord. When you are ready head to the next area, here three Asrai will attack you. Once you defeat them, another Asrai will show up. I used Pouke to fight them but you can use whomever you like. Once you defeat the folks head east to the next area.
In this area, you will have to fight two Dracae and three Asrals. Watch out for the green Mucus that Dracae will spit out. Dracae will go under ground (all you can see is there shell) to avoid being attacked.
We need to take the north exit but we must break the memory stones before you can head north (Sorry I do not remember how many memory stones were there) and take out the two Asrals. Use Henky to break the memory stone. In this area, there are three Dracae to fight. Defeat them all and a memory stone will appear. Break the memory stone using Henky for Undersea City Picture Book Page 4 and take the west exit.
Here there are two Asrai and one Cu Sidhe. Use Dracae to capture the Cu Sidhe and then defeat the two Asrai. There is a purple memory stone (use Ga-Boi) break it for some health. Then take the northern path.
In this area, there is a Hobbledy and three Asrai. The Hobbledy will attack you with a thunder element. Once you defeat the Hobbledy and three Asrai, three more Hobbledy will appear. Once you defeat them, a memory stone will appear. Then take the northeast path.
Tip - When fighting Hobbledy use a folk who has a multi attack.
In this area, we will have to fight Fraxinus. He will dash at you trying to knock you down or attack you. Use Dracae to trap him and Asrai to damage him. We will learn a new absorption called Balance Absorption. You tilt the controller so that the Id stays balanced. You can press R3 for the tutorial.
Head northeast to find a memory stone. Once you are done take the eastern exit. Here we have a glowing flower save you game.
From the glowing flower, follow the path down. Eventually, you will have a scene with The Faery Lord, Livane and Keats.
You will have to choose between the Forgotten Palace and the Swamp of Oblivion. The choice is yours. I will make a section for both of them.
Swamp of Oblivion
If you choose the Forgotten Palace, please skip this section.
Continue around the path after you talk to Scarecrow and you will see the entrance to the swamp.
Here you will have to fight a Peg Powler and two Asrai. Take out the two Asrai first and then take care of the Peg Powler. When you are done head north, you will see that there are some blue memory stones blocking your way. Use Peg Powler to break them and then continue north. Here three folks will attack you. Once you defeat the folks, head north. In this area take the southeastern path. Here you will fight four Alraunes. Once you defeat them, a blue memory stone will appear. Use Henky to break it for some health. Then two Peg Powlers will come and attack you. Once they are defeated, take the southern exit.
Note - When fighting Ascidia slumps down attack it with Pouke. They do this to restore their health.
Here you will have to fight some Hobbledys. Once you defeat them four Cu Sidhes and three Peg Powlers will jump you. Use Dracae to defeat the Cu Sidhes in one hit. Take the northern exit and then head east. If you break the blue memory stone using Henky you will get Undersea City Picture Book Page 1. If you break all three memory stones (Boobrie on the green one and Ga-Boi on the purple one) four Ascidia will attack you. Use your Warcadia folks (Degasser) on them. Once you defeat them, three Peg Powlers will attack you. Take the west exit and then take the northern path.
Here you will have to fight Malabaricus.
Malabaricus: be careful he will shoot two different bombs at you and he does a spinning attack that can hit you up to three times.
Palette:
Gargantua
Ga-Boi
Degasser
Hobbledy
Malabaricus is a Balance Absorption.
My Strategy:
Keep moving. When Malabaricus is chasing you use Gargantua to throw bombs at him (face him to make sure that your bombs are actually hitting him). If Malabaricus happens to throw bombs (any of the two) at you run across the room. DO NOT RUN IN A STAIGHT LINE.
When he does his spinning attack, watch him on the map to see which way he is going to go and you run the other way. Keep that up until he is tied (after the third one). Then attack him with Hobbledy, Degasser or Ga-Boi and then run. Keep in mind that while running you still need to shoot at him with Gargantua.
Once you defeat Malabaricus head north. You will meet Dr. Lester here. Dr. Lester will tell you to go find Herve. Also, talk to the other Underwater Citizens. There is a glowing flower in this area use it to go back to Doolin. You will be dropped off on Dwarf Beach. Go to your hut and rest.
When you awake go to the Pub and talk to Ganconer. Quest Time!
Quest: Raging Malabaricus - Defeat Malabaricus
We will start next to the glowing flower. Follow the path around until you reach the entrance to the Swamp; enter the Swamp. Head north, three times in a row. When enter the room there will be three Peg Powlers. Make sure they see we want the music to change. DO NOT ATTACK THEM EVEN IF THEY ARE TRYING TO ATTACK YOU. Wait for Ellen to say that she can feel a presence. Once this happens you can start attacking the Peg Powlers. You want to defeat as many of them as you can before Malabaricus shows up.
If you still have Peg Powlers to fight and Malabaricus has shown up avoid him. Try to take out the rest of the Peg Powlers. Once you defeat the Peg Powlers attack Malabaricus. Here is the strategy from the first time we fought him:
Palette:
Gargantua
Ga-Boi
Degasser
Hobbledy
Malabaricus is a Balance Absorption.
My Strategy:
Keep moving. When Malabaricus is chasing you use Gargantua to throw bombs at him (face him to make sure that your bombs are actually hitting him). If Malabaricus happens to throw bombs (any of the two) at you run across the room. DO NOT RUN IN A STAIGHT LINE.
When he does his spinning attack, watch him on the map to see which way he is going to go and you run the other way. Keep that up until he is tired (after the third one). Then attack him with Hobbledy, Degasser or Ga-Boi and then run. Keep in mind that while running you still need to shoot at him with Gargantua.
Reward: Rare Folk Coropuna
Leave the pub and go to your hut and rest. When you wake up it will be daytime. Go to the Pub and talk to the Pub Master. Quest Time!
Quest: Voice from Below the Sea - Unmask the source of the voice from the sea.
Note: There are many ways to complete this quest. I am going to give you three (the three that worked for me at different times).
Make sure that you fight every folk that you come across.
1. You will start at the Old Capitol head north. Defeat the folks in this room, then head east and clear the folks in this area. Once that is complete, the Faery will tell you that you did not find it. Head north, then west and then north again make sure you defeat ever folk. This time we found his pendent.
2. You will start at the Old Capitol head north. Defeat the folks in this room, then head east and clear the folks in this area. Go down the stairs into the next area and defeat the folks here. Go west through the door, defeat the folks here and the ones in the attached room to the south. Once you defeat the folks; go back north to the next exit and defeat the folks here. Once that is complete, the Faery will tell you that you did not find it. Head north, then west and then north again make sure you defeat ever folk. This time we found his pendent.
3. You will start at the Old Capitol head north. Defeat the folks in this room, then head east, clear the folks in this area and the ones down the stairs. Once that is complete, the Faery will tell you that you did not find it. Go north; you are now back in the room with a group of Hobbledy and Asrai. Once you defeat them, Ellen will say what this. This time we found his pendent.
Reward: Undersea City Picture Book Page 3 and Yellow Stone
Talk to the Pub Master again. Another quest.
Quest: Voice from Below he Sea (again) - Unmask the source of the voice from the sea.
Note: There are many ways to complete this quest. I am going to give you three (the three that worked for me at different times).
Make sure that you fight every folk that you come across.
1. You will start at the Old Capitol head north. Defeat the folks in this room, then head east and clear the folks in this area. Once that is complete, the Faery will tell you that you did not find it. Head north, then west and then north again make sure you defeat ever folk. This time we found his pendent.
2. You will start at the Old Capitol head north. Defeat the folks in this room, then head east and clear the folks in this area. Go down the stairs into the next area and defeat the folks here. Go west through the door, defeat the folks here and the ones in the attached room to the south. Once you defeat the folks; go back north to the next exit and defeat the folks here. Once that is complete, the Faery will tell you that you did not find it. Head north, then west and then north again make sure you defeat ever folk. This time we found his pendent.
3. You will start at the Old Capitol head north. Defeat the folks in this room, then head east, clear the folks in this area and the ones down the stairs. Once that is complete, the Faery will tell you that you did not find it. Go north; you are now back in the room with a group of Hobbledy and Asrai. Once you defeat them, Ellen will say what this. This time we found his pendent.
Reward: two Pulse Tree Nut, two Golden Ore and two Green Dust Stones
Leave the pub; go to your hut and rest.
We need to go back to Dwarf Beach. Leave your cabin and head west. Continue down the path, head east at the intersection. You will see the glowing portal. Go to it to get back to the Undersea City.
Once in the Undersea City go back to where you met Dr. Lester. Go north, west, north, north and then northeast. You will be back at the save point; follow the path around to enter the Swamp of Oblivion. Break the memory stones using Peg Powler. Then continue north and north again. We are now were we met Dr. Lester. Make sure that you use the glowing flower to save your game before continuing north. In this area, there is one Alraune and four Asrai to fight. Break the memory stone for Undersea City Picture Book Page 5. Once you defeat the Alraune and Asrai; two more Alraune and about four Cu Sidhes will attack you. Once you defeat them three memory stones will appear. Break them for some folk food and health. Exit this area to the north and we will have to fight Brigantia.
Boss: Brigantia
Palette:
Hobbledy - Tail
Fraxinus - Tail
Gargantua - Head
Brigantia is a Beat and Balance Absorption.
Note - I would recommend that you find your own strategy for him. I am still going to give you two strategies. In my opinion, neither of them is that great. I did die three times while fighting him. These are the best two that I could come up with.
Strategy 1-
Start by attacking the last part of his tale. You will need to stun him so that you can actually attack him. To do this you need to use Hobbledy. When he is stunned, he will pause; use Fraxinus to attack him.
After he tried to attack you, he will hide. On his third time trying to attack you, he will not go into hiding. This is your chance to try to stun him so you can attack him.
When you are down to just his head, you will still have to use Hobbled to stun him. Then shoot at it with Gargantua. When his head is spinning wait for it to stop before you start attacking it.
Strategy 2-
This strategy is kind of like hide-n-seek. When you first enter the room, run straight up (north) and choose a side to hide on either the left or right. While hiding, you will need to watch Brigantia by either using your map or moving R3 around. When Brigantia is hiding, run out into the main area but not too far from your hiding spot.
Wait for the bubbles of water (I am not sure what they are… you will know what I am talking about when you see them). Once you see them fall, you need to run back to your hiding spot. Keep doing this until it is going to be your third time.
If you are hiding on the right side you want to go far enough out (on the third time) that when you see the bubbles you can run to the left side.
Once the bubbles break, come out of hiding and face towards your left side. Brigantia is going to come from your left side. When he starts getting close to you (where you think he is about to hit you) use Hobbledy. Hopefully you timed it just right so that Hobbledy will hit the last part of his tail. When you hit him (with Hobbledy), the end of his tail has a bluish glow to it. Once this happens, attack it with Fraxinus hit only the glowing part. Keep repeating this until only his head is left.
If you were hiding on the left side, I recommend that you start hiding on the right side. Brigantia is going to start rolling around and dropping bubbles a lot. Wait for him to stop moving, run up to him and hit him with Hobbledy. If he does not move, attack him with Hobbledy (again) and Fraxinus. As soon as he starts moving run back to your hiding spot. Keep this up and you will have him beat in no time.
Tip - If his head is far away from you or you do not think that you can make it from your hiding spot to his head and back just wait.
Head south and talk to the Faery Lord. After the conversation the glowing flower will appear. Make sure you talk to the other Faerys that are here. Then use the glowing flower to go back to Doolin. Once in Doolin go to Dr. Lester's home and speak with Mrs. Lester.
The Forgotten Palace
If you choose to go to the Swamp of Oblivion, please go to Ellen Chapter 4 or Keats Chapter 3.
Go north to enter the Forgotten Palace. Here you will have to fight four Ascidia. Once you defeat then you will get Undersea City Picture Book Page 1. Head north; in this area, there are four Asrai and some memory stones. Take out the Asrai first, then break the memory stones, then head east and cross the bridge. Here you will have two Peg Powlers to fight. Once you defeat them, you will have to fight six Cu Sidhe.
Once your done take the west path back to the room with the memory stones and then take the west path. Defeat the folks here, break the memory stones, and then head north and then northeast to a new area. Defeat the folks here and then break the memory stones. The middle memory stone contains Undersea City Picture Book Page 2. When you are done head north. Here you will have to fight Malabaricus.
Malabaricus: be careful he will shoot two different bombs at you and he does a spinning attack that can hit you up to three times.
Palette:
Gargantua
Ga-Boi
Degasser
Hobbledy
Malabaricus is a Balance Absorption.
My Strategy:
Keep moving. When Malabaricus is chasing you use Gargantua to throw bombs at him (face him to make sure that your bombs are actually hitting him). If Malabaricus happens to throw bombs (any of the two) at you run across the room. DO NOT RUN IN A STAIGHT LINE.
When he does his spinning attack, watch him on the map to see which way he is going to go and you run the other way. Keep that up until he is tired (after the third one). Then attack him with Hobbledy, Degasser or Ga-Boi and then run. Keep in mind that while running you still need to shoot at him with Gargantua.
Take the north exit and you will meet Scarecrow. After the conversation talk to all the Faerys and use the glowing flower to go back to Doolin. You will be dropped off on Dwarf Beach. Go to your hut and rest.
When you awake go to the Pub and talk to Ganconer. Quest Time!
Quest: Raging Malabaricus - Defeat Malabaricus
We will start next to the glowing flower. Follow the path around until you reach the entrance to the Swamp; enter the Swamp. Head north, three times in a row. When enter the room there will be three Peg Powlers. Make sure they see we want the music to change. DO NOT ATTACK THEM EVEN IF THEY ARE TRYING TO ATTACK YOU. Wait for Ellen to say that she can feel a presence. Once this happens you can start attacking the Peg Powlers. You want to defeat as many of them as you can before Malabaricus shows up.
If you still have Peg Powlers to fight and Malabaricus has shown up avoid him. Try to take out the rest of the Peg Powlers. Once you defeat the Peg Powlers attack Malabaricus. Here is the strategy from the first time we fought him:
Palette:
Gargantua
Ga-Boi
Degasser
Hobbledy
Malabaricus is a Balance Absorption.
My Strategy:
Keep moving. When Malabaricus is chasing you use Gargantua to throw bombs at him (face him to make sure that your bombs are actually hitting him). If Malabaricus happens to throw bombs (any of the two) at you run across the room. DO NOT RUN IN A STAIGHT LINE.
When he does his spinning attack, watch him on the map to see which way he is going to go and you run the other way. Keep that up until he is tired (after the third one). Then attack him with Hobbledy, Degasser or Ga-Boi and then run. Keep in mind that while running you still need to shoot at him with Gargantua.
Reward: Rare Folk Coropuna
Leave the pub and go to your hut and rest. When you wake up it will be daytime. Go to the Pub and talk to the Pub Master. Quest Time!
Quest: Voice from Below the Sea - Unmask the source of the voice from the sea.
Note: There are many ways to complete this quest. I am going to give you three (the three that worked for me at different times).
Make sure that you fight every folk that you come across.
1. You will start at the Old Capitol head north. Defeat the folks in this room, then head east and clear the folks in this area. Once that is complete, the Faery will tell you that you did not find it. Head north, then west and then north again make sure you defeat ever folk. This time we found his pendent.
2. You will start at the Old Capitol head north. Defeat the folks in this room, then head east and clear the folks in this area. Go down the stairs into the next area and defeat the folks here. Go west through the door, defeat the folks here and the ones in the attached room to the south. Once you defeat the folks; go back north to the next exit and defeat the folks here. Once that is complete, the Faery will tell you that you did not find it. Head north, then west and then north again make sure you defeat ever folk. This time we found his pendent.
3. You will start at the Old Capitol head north. Defeat the folks in this room, then head east, clear the folks in this area and the ones down the stairs. Once that is complete, the Faery will tell you that you did not find it. Go north; you are now back in the room with a group of Hobbledy and Asrai. Once you defeat them, Ellen will say what this. This time we found his pendent.
Reward: Undersea City Picture Book Page 3 and Yellow Stone
Talk to the Pub Master again. Time for another quest.
Quest: Voice from Below he Sea (again) - Unmask the source of the voice from the sea.
Note: There are many ways to complete this quest. I am going to give you three (the three that worked for me at different times).
Make sure that you fight every folk that you come across.
1. You will start at the Old Capitol head north. Defeat the folks in this room, then head east and clear the folks in this area. Once that is complete, the Faery will tell you that you did not find it. Head north, then west and then north again make sure you defeat ever folk. This time we found his pendent.
2. You will start at the Old Capitol head north. Defeat the folks in this room, then head east and clear the folks in this area. Go down the stairs into the next area and defeat the folks here. Go west through the door, defeat the folks here and the ones in the attached room to the south. Once you defeat the folks; go back north to the next exit and defeat the folks here. Once that is complete, the Faery will tell you that you did not find it. Head north, then west and then north again make sure you defeat ever folk. This time we found his pendent.
3. You will start at the Old Capitol head north. Defeat the folks in this room, then head east, clear the folks in this area and the ones down the stairs. Once that is complete, the Faery will tell you that you did not find it. Go north; you are now back in the room with a group of Hobbledy and Asrai. Once you defeat them, Ellen will say what this. This time we found his pendent.
Reward: two Pulse Tree Nut, two Golden Ore and two Green Dust Stones
Leave the pub; go to your hut and rest.
We need to go back to Dwarf Beach. Leave your cabin and head west. Continue down the path, head east at the intersection. You will see the glowing portal. Go to it to get back to the Undersea City.
Once in the Undersea City go back to where you met Scarecrow. Go north, west, north, north and then northeast. You will be back at the save point; follow the path until you reach the entrance to the Forgotten Palace and enter the Palace. Now go east, northwest, north and north again. Use the glowing flower to save your game.
Head north to the next area; here you will have to fight two Hobbledys. Once you defeat them, break the memory stone for Undersea City Picture Book Page 5. When you are ready, cross the bridge and enter the other area. Defeat the folks in this room and then head north to fight Brigantia.
Boss: Brigantia
Palette:
Hobbledy - Tail
Fraxinus - Tail
Gargantua - Head
Brigantia is a Beat and Balance Absorption.
Note - I would recommend that you find your own strategy for him. I am still going to give you two strategies. In my opinion, neither of them is that great. I did die three times while fighting him. These are the best two that I could come up with.
Strategy 1-
Start by attacking the last part of his tale. You will need to stun him so that you can actually attack him. To do this you need to use Hobbledy. When he is stunned, he will pause; use Fraxinus to attack him.
After he tried to attack you, he will hide. On his third time trying to attack you, he will not go into hiding. This is your chance to try to stun him so you can attack him.
When you are down to just his head, you will still have to use Hobbled to stun him. Then shoot at it with Gargantua. When his head is spinning wait for it to stop before you start attacking it.
Strategy 2-
Wait for the bubbles of water (I am not sure what they are… you will know what I am talking about when you see them). Once you see them fall, you need to run to one of the walls. Keep doing this until it is going to be your third time.
Brigantia is going to come from your left side by the entrance. When he starts getting close to you (where you think he is about to hit you) use Hobbledy. Hopefully you timed it just right so that Hobbledy will hit the last part of his tail. When you hit him (with Hobbledy), the end of his tail has a bluish glow to it. Once this happens, attack it with Fraxinus hit only the glowing part. Keep repeating this until only his head is left.
Brigantia is going to start rolling around and dropping bubbles a lot. Wait for him to stop moving, run up to him and hit him with Hobbledy. If he does not move, attack him with Hobbledy (again) and Fraxinus. As soon as he starts moving, run into one of the walls. Keep this up and you will have him beat in no time.
Head south and talk to the Faery Lord. After the conversation the glowing flower will appear. Make sure you talk to the other Faerys that are here. Then use the glowing flower to go back to Doolin. Once in Doolin go to Dr. Lester's home and speak with Mrs. Lester.
Keats: Oblivion
Check List:
Folks:
|
Afanc |
Agar-agar |
Annwn |
|
Asrai |
Aughisky |
Drarucu |
|
Exedra |
Kraken |
Selkie |
Leave your base and go to Dr. Lester's house. Keats will automatically go to sleep after this conversation with Dr. Lester. When he awakes, leave your base and return to Dr. Lester's house. Dr. Lester is gone and Mrs. Lester wants us to find him.
Go to the henge. On your way there, you will run into Suzette. After the conversation with her, continue to the henge. Suzette will come with you. After the scene go talk to Mrs. Lester. When you can, choose to go back for the night.
Once in your base go to the couch and rest for a scene. When Keats awakes, he is at the henge with Ellen. After the scene go to the alter and offer the medical records for a scene.
After the scene, we will be in the Undersea City. Belgae is here waiting for us. You will automatically talk to him. Talk to Belgae again. When your done follow the path north and talk to all the Faerys. Herve is at the end of the path. Walk up to him for a scene. After the scene, continue north.
Here you will have to fight three Asrai. Once you defeat them; head east. In this area, you will have to fight Annwn and Drarucu. When you are ready take the south exit and then head west. Defeat the folks in this area and then continue north. Here you will have four folks to fight. Once you defeat then use Volcano to break the red memory stones and then take the north exit. Here you will have to fight Asrai and two Afancs; defeat the Asrai first.
Once you defeat them, a blue memory stone will appear use Afanc to break the stone for Undersea City Picture Book Page 3. When you are done, take the north exit. Here Keats will have to fight Agar-agar. If you hit him, it will make more Agar-agar appear. We must freeze him using Afanc or use Volcano to set him on fire and then freeze him. Use Ga-dearg to attack him when he is frozen. Once you defeat him, head northeast. Use Volcano to break the memory stone.
We are now at Old Capitol 2. Use the glowing flower to save your game. Then use it to go back to Doolin. Go to your base and rest. When you awake head to the Faery Realm portal. It is by the Old Lighthouse.
----Just so you know what is going on. We need to get a Bug-a-boo for an upcoming quest and to get some items from Warcadia that we were unable to get before.-----
Once in the Faery Realm turn around, there is a glowing flower. Search it, choose use portal and then select Road to Daru. Now head south, west and west. Here two Poukes will drop from the sky. Follow the path around to an open field and you will have to fight three/four more Poukes. Continue to follow the path around and three more Poukes will appear. Break the blue memory stones using Afanc, then fight and absorb the two Bug-a-boos. If you use Volcano, they will be finished in one hit.
Go back to the Road of Daru. Use the glowing flower to return to Doolin. Go to your base and rest. When you awake go to the portal for Warcadia. It is behind the church. The church is east of your base.
Once in Warcadia, search the glowing flower, select us portal and choose KB Territory. Take the west exit (you have to go north and then west). Use Afanc to break the memory stone so you can enter the area. You will have three Hawks (I believe that is what they were) and one Volcano. Once you defeat them use Volcano to break the three red memory stones. You will get some folk food and Warcadia Picture Book Page 2. Head east and then south back to the glowing flower; use it to go back to Doolin. Go to your base, rest, go to the Pub and talk to Ganconer. Quest Time!
Quest: Homesick Bug-a-boo: Fight folks from entrance of the Faery Realm to the Road to Daru using Bug-a-boo.
*You can only use Bug-a-boo to fight the folks*
Head north, follow the path, go north, continue north and go around the tree to the exit. Defeat the folks and break the memory stone for some health. Take the northern exit, go north, then east, then east again and lastly go north.
Reward: three Pulse Tree Nuts, three Warm Tree Nuts and three Cold Tree Nuts
Leave the Pub and go to the Undersea City Portal it is locates on the Cliff of Sidhe. Use the glowing flower that is behind you, to teleport to Old Capitol 2. Follow the path until you have a scene with Livane.
Which ever place, the Swamp of Oblivion or the Forgotten Palace, you choose with Ellen; Keats will do the other one. Once again, I will cover both of them.
Swamp of Oblivion
Follow he path around to enter the Swamp of Oblivion. There are two Selkies and two Afancs. Defeat the Selkies using Drarucu and then the Afancs. Go north and then east. Defeat the folks in this room and then head north. Defeat the folks in this area and break the memory stone for Undersea City Picture Book Page 4.
Take the east exit; defeat the two Augiskys and two Asrais. Once they are defeated, a group of folks will appear. Break the memory stone for Undersea City Picture Book Page 1. Go west (back to the area you were in before) and then take the northern exit.
Here you will have to fight Exedra. Use Gargantua to knock it out of the air and Hinky-Punk to attack it. Head north to the next exit.
Here you will meet Dr. Lester. Go north to the glowing flower; use it to head back to Doolin. Go to your base, rest, go to the Pub and talk to Ganconer.
Quest: Lost Annwn - Use Annwn to escort Annwn to Forgotten Palace
Reward: Rare Folk Tathlum
Go to the portal on Cliff of Sidhe to go back to the Undersea City. Use the glowing flower behind you to go to the Swamp of Oblivion (under portal). Search the glowing flower, save your game and head north for Undersea City Picture Book Page 5. Go north again. Boss time!
Boss: Brigantia
Palette:
Selkie - Tail
Ogma - Tail
Exedra - Head
Gargantua - Head
Brigantia is a Beat and Balance Absorption.
Note - I would recommend that you find your own strategy for him. I am still going to give you two strategies. In my opinion, neither of them is that great. I did die three times while fighting him. These are the best two that I could come up with.
Strategy 1-
Start by attacking the last part of his tale. You will need to freeze him so that you can actually attack him. To do this you need to use Selkie. When he is stunned, he will pause; use Ogma to attack him.
After he tried to attack you, he will hide. On his third time trying to attack you, he will not go into hiding. This is your chance to try to freeze him so you can attack him.
When you are down to just his head, you will still have to use Exedra to freeze him. Then shoot at it with Gargantua. When his head is spinning wait for it to stop before you start attacking it.
Strategy 2-
This strategy is kind of like hide-n-seek. When you first enter the room, run straight up (north) and choose a side to hide on either the left or right. While hiding, you will need to keep a look out for Brigantia by either using your map or moving R3 around. When Brigantia is hiding run into the main area but not too far from your hiding spot.
Wait for the bubbles of water (I am not sure what they are… you will know what I am talking about when you see them). Once you see them fall, you need to run back to your hiding spot. Keep doing this until it is going to be your third time.
If you are hiding on the right side you want to go far enough out (on the third time) that when you see the bubbles you can run to the left side.
Once the bubbles break, come out of hiding and face towards your left side. Brigantia is going to come from your left side. When he starts getting close to you (where you think he is about to hit you) use Selkie. Hopefully you timed it just right so that Selkie will hit the last part of his tail. When you hit him (with Selkie), the end of his tail has a bluish glow to it. Once this happens, attack it with Ogma hit only the glowing part. Keep repeating this until only his head is left.
If you were hiding on the left side, I recommend that you start hiding on the right side. Brigantia is going to start rolling around and dropping bubbles. Wait for him to stop moving, run up to him and hit him with Exedra. If he does not move, attack him with Exedra again and Gargantua. As soon as he starts moving, run back to your hiding spot. Keep this up and you will have him beat in no time.
Tip - If his head is far away from you or you do not think that you can make it from your hiding spot to his head and back just wait.
After you defeat Brigantia, you will get to talk to Herve. After the scene with Herve, head south for a scene with Livane and then use the glowing flower to return to Doolin. Once in Doolin go to the church and then enter the first door on your left.
The Forgotten Palace
When you enter the Forgotten Palace, you will have two Afancs to fight. Once you defeat them you will receive Undersea City Picture Book Page 1 from a green memory stone. Use Pouke to break the stone. Head north to exit this room.
In this room, there are three folks to fight. Once you defeat them, break open the memory stones. Use Afanc to break open the two memory stones at the bottom of the room. Now take the east exit. Here there are three Augiskys to fight. Defeat them, break the memory stones and three more Augiskys will appear. Inside the memory stone that you just broke was Undersea City Picture Book Page4. Go back west and then take the west exit. Head north and you will have to fight two Afancs and three Selkies. Use Drarucu to defeat the Selkies.
Once you're done take the northeast exit. Defeat the folks here, break the memory stone and then head north. Here we are going to fight Exedra. Use Gargantua and Hinky-Punk to attack him. Use Gargantua to knock him out of the air and use Hinky-Punk to attack him when he is on the ground. Once you defeat him, take the northern exit.
In this area, you will meet Belgae. Use the glowing flower to save you game and to go back to Doolin. Once in Doolin go to your base, rest, then head to the Pub and talk to Ganconer.
Quest: Chase away the Thug - Chase the thug, Wilde, from the henge
Talk to all the halflives and then head north, go up the stairs and take the northwest exit. Take the northeast exit again, then head north and talk to Jimmy. He will tell you that he is not scary. Now talk to Frizzie. You will automatically go to the Pub… talk to Wilde.
Reward: Warcadia Picture Book Page 3 and Ruby
Exit the pub and go to the portal on the Cliff of Sidhe to go back to Undersea City. Search the glowing flower behind you to use the portal to go back to the Forgotten Palace. Use the glowing flower in this area to save your game and head north to the next area. Defeat the folks here and then head north up the stairs. Inside the memory stones are some health and Undersea City Picture Book Page 5. Take the north exit. Boss Time!
Boss: Brigantia
Palette:
Selkie - Tail
Ogma - Tail
Exedra - Head
Gargantua - Head
Brigantia is a Beat and Balance Absorption.
Strategy 1-
Freeze Brigantia's tail with Selkie. Once his tail is frozen use Ogma to cut it off. Repeat this until his head is left.
When you just have the head left attack it with Exedra and Gargantua (when it is frozen).
Strategy2-
Attack the last part of his tail with Selkie. We need to freeze it. It will have this bluish glow to it once it is frozen. When the tail is frozen, attack it with Ogma until it falls off. Keep this up until all of his tail is gone (the only thing that is left is his head).
Attack the head with Exedra to freeze it. When it is frozen, shoot it with Gargantua.
After you defeat Brigantia, you will get to talk to Herve. After the scene with Herve, head south for a scene with Livane and then use the glowing flower to return to Doolin. Once in Doolin go to the church and then enter the first door on your left.
Chapter 4
Ellen: Darkness
Check List:
Folks:
|
Answerer |
Brollachan |
Candela |
|
Garbera |
Habertrot |
Humpty |
|
Leideage |
Mabinogion |
Skeiker |
|
Spriggan |
Thrumpin |
////////////// |
After the scene go to Harriet's house and talk to her. Harriet tells us to go talk to O'Connell. He lives in the house next to Harriet. Go there and talk to him. He will give us a Brass Medallion that belonged to Lulu.
Go to your hut and rest. When you awaken, go to the Undersea Portal. We have some things to finish up here.
Search the flower behind you and use the portal to go to the Old Capital 2. Follow the path and enter the Forgotten Palace. Defeat the folks here and break the memory stones. One of them (the blue one) will contain Cloak of the Deep.
For those of you who choose to go to the Forgotten Place can skip this part; head south, use the flower to go back to Doolin. For those of you who did he Swamp of Oblivion, we need to continue for Undersea City Picture Book Page 2.
Head north, west, north and then northeast. Defeat the folks here and a purple memory stone will appear. Break it for Undersea City Picture Book Page 2. Head west, south, east, south and you will be back at the Old Capitol 2. Go to the glowing flower and choose Doolin.
Once in Doolin go to the Pub and talk to the Pub Master. Do the quest Thanatophobia.
Quest: Thanatophobia - find medicine undersea to treat overdrinking pub master
Go down the path and talk to Frizzie, the Faery and Charlie. Then enter the Forgotten Palace. Head north, west, north, northeast, go north up the stairs and north again. Talk to the Faerys and Frizzie, You will automatically be sent to the pub. Then talk to Frizzie again. Then talk to the pub master.
Reward: three Green Dust Stones, three Yellow Dust Stones and three Purple Dust Stones
Go to your hut and rest. When you awake up go to the henge and offer the Brass Medallion. After the scene, we will be in the Eternal Corridor. There are Faerys here; talk to them if you want. When you are ready; head north. After the conversation, continue north.
In this area, you will have folks to fight. When fighting Thrumpin use Ga-Boi. Once you defeat the folks head west. Break the memory stones with Peg Powler (the blue ones) and Boobrie (the green ones). Folks will come out and attack you once you break the memory stones. Defeat them and then take the southern exit. Defeat the folks again in this area and then head north.
In this room, be careful because once you defeat the folks more will come. Once you have defeated every folk in this room head north. Defeat the folks in this area but watch out for the white memory stones… they are bombs. In the colored memory stone (sorry I do not remember which color it was) you will receive Endless Corridor Book Page 4. Once you defeat the folks take the northeast exit. Take the southwest exit; break the memory stones. Take the north exit; break the memory stones here for Endless Corridor Picture Book Page 3. Then exit the room.
In this room, defeat the folks again. Look on your map for a blue dot. When you get close to the dot, it will disappear and then reappear in the southern part on the screen. Approach the dot and it will run away again but DON'T follow it. Head back north (stay in this room) and break all the memory stones (there are three on the ground and one in the air. Then four more memory stones will appear towards the southern part of the room. Break them for Endless Corridor Picture Book Page 2 and then take the south exit.
In this area, you will have to fight Habetrot. Use Ga-Boi to attack him when he multiplies use Coropuna to attack him. All you have to do is hit the copies once and they will fall over and disappear. When you are down to just the original Habetrot, attack it with Ga-Boi. Keep doing this until you defeat him. He is a Stop and Go Absorption.
Once you defeat Habetrot, break the memory stones and then take the south exit. We are now in the tower Brahma; head to the door for a scene. After the scene, you will be in the pub. Exit the pub and you will be back in the Tower Brahma. Head south down the stairs, talk to the Faerys and continue to the next area.
NOTE - Only attack the Mabinogion.
In this room, use Peg Powler to defeat Mabinogion. Then exit the room and then re-enter the room. You will have to fight Mabinogion again but this time use Henky to defeat him. After you defeat him, a door will appear; enter the door. In this area defeat, Mabinogion and another door will appear enter that door. Defeat Mabinogion again and then enter the door.
Here you will have to fight Habetrot again. You will have two minutes to defeat him. Just so you know that when I saw defeat him that includes absorbing his Id.
*******If you don't defeat him within the two minutes; exit the room and re-enter to fight him again.*********
Once you defeat him a memory stone will appear, break it for Endless Corridor Picture Book Page 5. Take the eastern exit, turn around, enter the room again and fight Habetrot. This time you have a minute and 30 seconds to defeat him. Once you defeat him a memory stone will appear, break it for Cloak of the Dawn. Take the northern exit.
In this area, there is a glowing flower, save your game and change into the new cloak. Head north down the stairs. We have to do the same thing that we did before (when we fought the Mabinogion only) but this time we have to defeat Mabinogion last. This is somewhat tough because Mabinogion will be more aggressive. After you defeat them a door will appear, enter the door. You will have to do the same thing again two more times.
After you enter the third door, you will have to defeat Habetrot and then take the west exit. Use the glowing flower to save your game and then go speak to Livane. Go down the stairs, talk to the Faerys and then go to the glowing thing that is blocking your path. Then go back up the stairs to the glowing flower and head to Doolin for a scene.
After the scene, you will be in the church talk to everyone. Talk to Mrs. Lester last. After the conversation with Mrs. Lester, you will be outside with Scarecrow. Leave the church and go to the portal for the Endless Corridor. Search the glowing flower; use the portal to go back to the Tower Brahma 2.
Go down the stairs and talk to the Faerys. After you finish talking to the Faerys, go back to the glowing flower and save. Then go back down the stairs; head to the next area.
Boss: Fleshrum
Palette:
Spriggan - Hands
Peg Powler - Eyes
Answerer - Heart
Fleshrum is a Beat, Stop and Go Absorption.
Strategy 1-
Thrumpin will attack you. Take them out before you fight Fleshrum (when they come). Use Peg Powler to attack Fleshrum's eyes. Once you have defeated his eyes, you will be able to see the heart. Attack the heart with Answerer. When you are attacking the heart, it will shoot out some green stuff; dodge it. Keep this up until it goes back into hiding.
Now he will open up all his eyes. Run around shooting them all with Peg Powler. Keep a look out because he will still try to attack you with his hands and feet. Use Spriggan to defend yourself from Fleshrum's punches and kicks. Once all the eyes are closed, the heart will appear again; attack it. Keep this up until his Id appears.
Strategy 2-
Start by attack his eyes; they are on the walls with Peg Powler. Move from eye to eye (you have to hit each eye twice. Hit one eye once, then move to another one, and then go back to the first one). If you stay in one place too long he will try to hit you with his hands or step on you with his feet. You can tell when his hands area about to come because the wall will light up. If it is the left wall then he is going to punch towards the left. If it is the right then he is going to punch right.
Once all the eyes are closed, the heart will come out; attack it with Answerer. Make sure you move around the heart because it spits out this sticky green stuff. Once the heart goes back down in the mouth; start attacking the eyes again until they are closed. Then attack the heart.
In addition, if you see stuff fall from the sky move because he is going to try to step on you.
Once you defeat Fleshrum, watch the scenes. At the henge, Ellen will talk to a Faery. After you talk to the Faery, talk to the Faery Lord. After the conversation go to the alter and offer the Silver medallion. Enter the opened door, head north and enter another door. Head north again and talk to Livane.
After the scene go to O'Connell's house for a scene. You will automatically go to the henge. Use the Silver Medallion to the alter. Enter the door, head north, enter the door, head north and eventually you will have a scene. Exit the henge and talk to Suzette for another scene.
Keats: Labyrinth
Check List:
Folks:
|
Answerer |
Brollachan |
Galley-Beggar |
|
Habertrot |
Luideag |
Padfoot |
|
Spriggan |
Thrumpin |
////////////// |
Try to exit your base. You will see a letter from Harriet. When you exit your base, go to the Pub.
Quest: Difficult Patient - find out how Dr. Lester took Herve on as a patient
You will start in the Undersea City. Go north talk to Dr. Lester, then to Regine and then to Mrs. Lester. Go north, west, north, north, northeast and go down the path until you run into Herve and Cecilia. Then go back up the path to talk to Dr. Lester and Mrs. Lester. You will automatically go to the Lester home; talk to Mrs. Lester.
Reward: Undersea City Picture Book Page 2 and Emerald
Exit the Lester home and go to Harriet's house for a scene. When you can go to the TV (behind O'Connell), search it for Brass Medallion. After the conversation with O'Connell, you will have to make a choice. You can explore or go to the henge. Choose to go to the henge. At the henge go to the alter and offer the Brass Medallion for a scene. After the scene with Belgae, head north for a conversation with a Rebel Denizen. After the conversation, continue north.
In this area, there are six Brollachan and an Answerer to fight; defeat them and then head north. In this room, you will have to fight two Brollachan and a Luideag. Defeat Luideag first… if you can. If you defeat the two Brollachans first then four more will appear.
Once you defeat them, break the memory stone for Endless Corridor Picture Book Page 4. Then head south, defeat the folks in this room again and then take the western exit. In this room, you will have three Brollachans and two Galley-Beggars. Use Bargest, Answerer and Ga-Dearg to defeat Beggar. Beggar is a Beat Absorption. Once you defeat them take the south exit. Defeat the folks in this room and five memory stones will appear. Use Poury to break the memory stones. There is also a memory stone in the fireplace. If you break it four more Brollachans will attack you.
When you are done take the northeast exit. In this room, you will have four Thrumpins and an Answerer to fight. When you defeat the Thrumpins more will appear. Be careful with the memory stones, some contain folk food and others are bombs. When your done take the southern exit. In this room, you will have a lot of Thrumpins and Brollachans to fight. As you defeat them, more will come. Once you have defeated them all (even the one that re-appear) a memory stone will appear. Break it for Endless Corridor Picture Book Page 1.
There is a Habetrot standing by the southern exit. Go to it and it will runaway. DO NOT FOLLOW IT. Instead, take the north exit. In this area, you will have to fight Spriggan (use Answerer and Ogma). Once you defeat him, a memory stone will appear, break it for Endless Corridor Picture Book Page 3. If by chance, you break the memory stone and it is not the Picture Book Page. Exit the room to the south and take the north exit again.
Exit the room, defeat the folks here and this time take the southern exit. Here you will have to fight Habetrot. Use Pouke, Ga-Dearg and Afanc to defeat him. If a spotlight is over Keats, move. Habetrot will use this to drop stuff on Keats. Take the south exit. You are now in Tower Brahma. Approach the door for a scene. After the scene; talk to Harriet. After the conversation, exit the pub. You will be back at the Tower Brahma. Follow the path, talking to the Rebel Denizen as you go down the path and then go to the next area.
Here you will need to attack the folk with the light on its head, which is Padfoot. Attack ONLY Padfoot. Once you absorb him, a door will appear. Search the door. In this area, you will have Padfoot and two Answerers to fight. Only attack and absorb the Padfoot. Go through the door. Now you have Galley-Beggar, Answerer and Padfoot. Only attack and absorb Padfoot. Go through the door and this time you will have to fight Habetrot. You will have 1 minute and 30 seconds to defeat and absorb him.
After you defeat him, you will get Endless Corridor Picture Book Page 5. Take the northern exit when you are done. You are now at the Tower Brahma. Use the glowing flower to save your game and return to Doolin. Once in Doolin go to the Pub.
Quest: Mystery Letter - the mystery of the letter and go to the location
With this quest you do not have to fight the folks if you don't' want too. This is only ok for the rooms that have one folk in them. Which is the first five rooms.
You will start in the Endless Corridor. Go north, west, south, northeast, south and south. You are now in a room with three folks (Padfoot, Luideag, and Spriggan). You need to fight them in this order: Padfoot, Spriggan, Luideag, Spriggan and Padfoot. You will then find the lost person.
If you do not do it in that order then you will continue to go in circles (as I did… until I figured it out). Eventually you will come across a Rebel Denizen who tells you about the number of folks in each room.
Reward: three Green Dust Stones, three Yellow Dust Stones and three Purple Dust Stones
Exit the pub; go to your base and rest. When you awake go to the Endless Corridor portal located in front of the pub. Once in the Endless Corridor, search the glowing flower (behind you), use the portal to go to Tower Brahma. Head north down the path and talk to the Rebel Denizens. Continue north to the next area. Here we need to defeat the folks without a light bulb (Padfoot) on there head first.
In the first area, you will have several Thrumpins and a Padfoot. Defeat the Thrumpins first and then the Padfoot. A door will appear, search it to go to the next area. Here you will have three Brollachan (I think that is what they are), Spriggan and a Padfoot. Defeat them and the door will appear. Search it to go to the next area. Here you will have Spriggan, Galley-Beggar and Padfoot to defeat. Once you defeat them, a door will appear. Before you enter, the door set up your palette. Make sure you have Ga-Dearg, Bargest and Afanc (or whichever folk you like to use to defeat Habetrot). Enter the door. You will have 1:10 to defeat Habetrot.
Once you defeat him, exit the room to the west. Go down the stairs and talk to Livane. After the conversation, continue down the path until you reach a Mnemosyne. After the scene, go back to the glowing flower and head back to Doolin.
Once in Doolin, you will have a conversation with O'Connell. After the conversation go see Mrs. Lester, she is in the church. Leave the church and go back to the Endless Corridor portal, use the glowing flower to teleport to Tower Brahma 2. Go down the path and you will have a conversation with Belgae. Go back to the glowing flower and save your game.
Boss: Fleshrum
Palette:
Spriggan - Hands
Annwn - Eyes
Habetrot - Mouth
Answerer - Heart
Stop/Go and Beat Absorption.
Strategy 1:
Fleshrum will send some Thrumpins to attack you. Defeat them and then attack his eyes, which are on the walls. Once you defeat his eyes, his mouth will open just a little bit. Attack his mouth with Habetrot until it opens up completely. Once you see the heart attack it with Answerer. Use Spriggan to defend yourself from Fleshrum's attacks. Keep this up until you defeat him.
Strategy 2:
Fleshrum will send some Thrumpins to attack you, use Pouke to defeat them quickly. Defeat them and then attack his eyes, which are on the walls. Do not get close to the eyes. When you attack them, they will shoot out something at you. Move from eye to eye… this will give you a better chance at dodging the punches and foot. Once you defeat his eyes, his mouth will open just a little bit. Attack his mouth with Habetrot until it opens up completely. Once you see the heart attack it with Answerer. Use Spriggan to defend yourself from Fleshrum's attacks. Keep this up until you defeat him.
After the scenes, offer the Silver Medallion at the Alter after your conversation with Belgae. Enter the door that is now open. After the scene, continue down the hall, enter the door and continue down the path. After your conversation with Livane, go to the door behind her. After the scene, go to your base and rest. Go back to the henge and offer the Silver Medallion. Enter the door, go north, enter the door and go north for a scene.
Chapter 5
Ellen: Guilt
Note - to get the Cloak of Twilight you might have to go through the Hellrealm a couple of times to get all the memory stones. Work your way from bottom to top, top to bottom and bottom to top. Make sure that you break every memory stone. Use Fomoire to break the memory stone to the east by the water falls.
Check List:
Folks:
|
Baogbolc |
Baolwind |
Beithir |
|
Boggart |
Caesg |
Coblynau |
|
Fachan |
Fomoire |
Mandragora |
|
Morallta/Beagallta |
Ulbyr |
Ulghter |
|
Wryneck |
///////////////////////////////// |
///////////////////////////// |
Watch the scene between Ellen and O'Connell. Exit O'Connell's home for another scene. After the scene, go to your hut and rest. When you awake go to O'Connell's house. There is a glowing/flashing light by his desk; search it. Then search the television. Watch the movie scene, a portal will appear in O'Connell's living room and we are now in the Hellrealm.
Go down the path and speak to the residents of the Hellrealm. At the end of the path you will meet Scarecrow; continue to the next area. Here you will have five Boggarts to fight. Defeat them and a white memory stone will appear; break it for Hellrealm Picture Book Page 3 and ten take the west exit.
In this room, there are five Mandragoras, the look like weird memory stones. Defeat them and head north to the next area. Prepare your self for a fight.
Fomoire (even though he is not a boss)
Palette:
Ga-Boi - two flying folks that come
Degasser
Pouke
Beat Absorption.
It is really hard to do close attacks on him. He will start doing spinning punches, pounding the ground and throwing rocks; attack him with Degasser. Eventually, two flying folks (one with a bulb on the end of his tail and the other one drops sticky stuff on you) will come. Knock them out of the air with Degasser and attack them with Ga-Boi. While fighting the two folks don't worry about Fomoire. Once you defeat them, go back to attacking Fomoire with Degasser. When he falls over, attack him with Pouke and Ga-Boi.
Once you defeat him, take the north exit. Three Fachans will attack you. Use Pouke to defeat them. There is a purple memory stone that will appear. Use Ga-Boi to break it for Hellrealm Picture Book Page 1. Take the south exit and then the southwest exit. Defeat the folks here and break the memory stone for Hellrealm Picture Book Page 2. Go back west, then north, defeat the three Fachans and then go north.
In this area, you will find the Faery Lord. Go up to him for a scene; after the scene, talk to Scarecrow. Use the glowing flower to go back to Doolin. Exit O'Connell's house, go to the pub and talk to the Pub Master.
Quest: the Girl and the Robot - find out if Charlotte's dreams are caused by a quarrel
Head north, talk to Charlotte, Frizzie and then go north to the next area. Defeat the folks; go west, north and then north again. Here talk to Damona, Gam and Cee. Then head south and you will have a scene with Charlotte, Gam and Cee. After the scene continue south to the exit. You will now be at the beginning to the Hellrealm; talk to Frizzie and Ganconer. In the house enter the room on your right and talk to Charlotte.
Reward: five Pulse Tree Nut, five Warm Tree Nuts and Cold Tree Nut
Talk to the Pub Master again.
Quest: Voices of Vengeance - find the cause of Charlotte's nightmares
Go north, north, north, east, southeast and south. Defeat all the folks in these areas. Break all and only the blue memory stones. In the last room you have a certain amount of time to defeat them before reinforcements arrive.
Reward: three Golden Ore, three Green Ore and three Green Quartz Stones
Go to your hut and rest. When you awake go back to the Pub and talk to Ganconer.
Quest: The Pioneer:
You will start off in the Endless corridor. Talk to Damona, the three Rebel Denizens; go north, north, north, south, west and talk to Frizzie and the Mnemosyne. Now we are in O'Connell's house; talk to him. Now we are in Keats base; talk to Keats.
Reward: Endless Corridor Picture Book Page 1 and purple stone
Talk to Ganconer again.
Quest: Mandragora, the Delicacy - catch three Mandragora within the time limit
We start off in the Hellrealm. Follow the path and take the north exit. From here I am not sure which way I went. You can only go one way. They have the other ways blocked off. When you get to the room with three Fachan and three Baolwind; use Mandragora or Fachan to defeat Baolwind. Then you go west and you will be in a room with three Fachan and a bunch of Mandragora. Defeat the Fachan first. Make sure you don't hit the Mandragora. Remember it is that thing that looks like a memory stones. Once you defeat the three Fachan attack the Mandragora. You will have one minute (I think) to absorb three Mandragoras (Three Mandragoras count as one… so you need to defeat nine of them in total).
Reward: Rare folk Grindylow
Exit the pub and go to O'Connell's house; enter the portal. Use the glowing flower portal to go to Hill of Brimstone 2. Climb up the ladder and take the west exit. Defeat the folks her and three memory stones will appear. Now there are four memory stones for you to break (the three that appeared and the one that was already in the room when you entered). Break them for some folk food (in the three that appeared) and Hellrealm Picture Book Page 4.
Exit this room to the east. There are two elevator switches. One does nothing when you walk up to it and the other one ascends. Choose to ascend. While on the elevator you will be attacked by three folks. Once you defeat them the elevator will stop; take the east exit. Defeat the five folks in this room and break the memory stones. Now go back west and take the west exit. Defeat the folks here and break the memory stone for Hellrealm Picture Book Page 5. Head east and choose to ascend at the elevator switch. There will be three more folks to fight. Defeat them and the elevator will stop. Take the west exit. Head east, go back to the elevator and choose to ascend. Defeat the folks and the elevator will stop.
Morallta/Beagallta
Palette:
Habetrot or Cait Sidhe
Coblynau
Use Coblynau to attack Morallta/Beagallta until he turns black. Once he is black use Habetrot or Cait Sidhe on Morallta/Beagallta until he turns back to his normally color. Keep this up until you beat him.
Once you defeat him, break the memory stone and go through the gate. Make your way north up the path fighting the folks along your way. Exit this area to the north. Finally a freaking glowing flower! Use the glowing flower to save your game and to go back to Doolin. Exit O'Connell's house, go to your hut and rest. When you awake go to the pub and talk to Ganconer.
Quest: Urisk Gathering - disband the Urisk gathering
You will start off in the Hellrealm. Follow the path and take the north exit. Then head west, north and north. Defeat the Urisk before more of them arrive.
Reward: Rare folk Alhazred
Exit the pub, go to O'Connell's house and enter the Hellrealm portal. Follow the path north, then east, north, west, north and north again. Make sure you break all the memory stones. Use Habetrot to defeat the three Caesags and break the memory stone that appears. It is not the purple one… I don't remember which color it is. Then head north, follow the path to the glowing flower and use it to teleport to the Inquisition Bridge.
Head south from the glowing flower; you should see a memory stone break it for the Clock of Twilight. Then head back north to the Inquisition Bridge. Use the glowing flower to save your game; then continue north. Talk to the Faery Lord for some scenes.
Boss: Yama
Palette:
Fomoire - Mirrors
Beithir – Force Field
Morallta/Beagallta - Yama
Timing and Beat Absorption.
Strategy 1-
Use Fomoire to destroy the mirrors. Attack the mirror that is glowing. Once all the mirrors are gone, Yama will appear with a force field around him use Beithir to break the force field. Once the force field is gone attack him with Morallta/Beagallta.
Strategy 2-
Stay by the wall. Use Fomoire to attack the glowing mirror. Be careful sometimes the mirror throws green balls at you. Once you break one of the mirrors Yama will attack you.
Once all the mirrors have been destroyed Yama will appear. He has a force field around him. He will say "now the birds" and the birds will come out and fly in a circle around him. He will also say something that sounds like "and Christmas", when he says that run around the wall. He is about to shoot three green balls at you. He sometimes disables your folks. When this happens just dodge his attacks.
Get close enough to Yama to attack him with Beithir. Once you break his force field you need to attack him with Morallta/Beagallta. You don't have to be close to Yama to attack him. Just line Ellen up with Yama and then send out Morallta/Beagallta. He will do some spin move and then run right into Yama. Keep doing this (breaking the force field/attacking him) until you defeat him.
Once you defeat Yama, you will have a scene with Keats. Head south after talking with Keats for another scene. You are now in Doolin, you will see Ryan by O'Connell's house; talk to him. Then go to Harriet's house. Now go to the Lester home and talk to Mrs. Lester and Dr. Lester. Exit the house for another scene.
You are now in the church, go to the office for yet another scene. Leave the office and you will see Cecilia; go to her. We are now at the henge. Go to Harriet and Cecilia for a scene. Enter the opened door for some scenes.
Keats: Judgment
Check List:
Folks:
|
Baogynis |
Baolydead |
Beithir |
|
Boggart |
Coblynau |
Durandal |
|
Fomoire |
Kalmia |
Mandragora |
|
Ulhgik |
Urisk |
|
Exit your base for a scene with Suzette. Go talk to O'Connell. When you get the chance, select wait until night fall. Go to the pub and talk to Ganconer.
Quest: Frizzie's Love - Frizzie fancies someone. Find out whom
You will start off in the Endless Corridor, talk to Damona, Jimmy and Charlie. Then go north, south, northeast, south, south and south. Talk to Fir Darrig, go down the stairs and talk to Jimmy for a scene.
Reward: Endless Corridor Picture Book Page 2 and emerald
Exit the pub, go to O'Connell's house and search the television for a scene. You are now in the Hellrealm. After talking to Scarecrow, head north for a scene with Belgae; continue north. Defeat the five Boggarts and break the memory stone for Hellrealm Picture Book Page 2. Take the east exit. Defeat the folks here, go west, defeat the folks and break the memory stone for Hellrealm Picture Book Page 3.
Now go back east, west, defeat the five folks here again and take the west exit. There are five folks in this area, defeat them and then head north. Fomoire is here. Use Bargest to attack him. Ulhgik and Urisk will come and help Fomoire out. Once they show up defeat them and then finish off Fomoire.
Once you defeat them; head north. Defeat the folks here, break the memory stone for Hellrealm Picture Book Page 4 and then go north to the next area. Go down the path and talk to the Faery Lord. After the scene, Belgae will talk to you; after the conversation climb up the ladder. Take the west exit and defeat the folks here. To defeat the Kalmias use Aughisky to freeze them and attack them with Pouke a couple of times. When they are no longer frozen their Id will turn red.
When your done exit the room and take the elevator up to the next floor. During the elevator ride you will have two Beithir and an Ulhgik to defeat before it will stop at your floor. Once you defeat the folks and the elevator stops; head east.
When you first walk in the room there is a memory stone, be careful when you break it… Beithir will appear. Defeat her and head for the exit. Three Boggarts will appear. Defeat them and two Ulhgiks will appear. Once you defeat the two Ulhgiks and another memory stone will appear. Break it for some health. Exit the room and then head west.
In this room, you will have a lot of Boggarts to fight. There is a memory stone in this room as well. If you need health break it. Once you defeat all the folks three more memory stones will appear. Break them, exit the room and take the elevator up to the next floor. Defeat the folks on the elevator and when it stops head west. Defeat the folks here and break open the memory stones for Hellrealm Picture Book Page 1.
When your done exit the room and take the elevator up again. Defeat the folks on the elevator. As soon as the elevator stops Durandal will attack you. You can use Annwn to freeze him and Padfoot to attack him.
***For me… the first time I tried to freeze him and then attack him, I killed him. So, I had to start all over again. The second time I just attack him with Padfoot and in no time his Id appeared.***
Once you defeat him, head north to the next area. Defeat the folks here and break the memory stone for Hellrealm Picture Book Page 5; head north thru the door. Use the glowing flower to go back to Doolin.
Exit O'Connell's house, go to your base and rest. When you wake up; go to the pub.
Quest: Stolen Bottle - Defeat Boggart and retrieve the bottle
Head down the path and talk to the Faery. You now have 4 minutes to get to the second floor of the tower. Climb up the stairs, go west and defeat the folks here. Exit the room, use the elevator to go up and defeat the folks on the elevator. The timer should now stop. Go west, defeat the folks here, exit the room, then head east and defeat the folks.
Reward: Rare folk Langelaan
Talk to Ganconer again.
Quest: Starving Beithir - Use Beither and sub-species to defeat folks in Hellrealm
We start off in the Hellrealm go north, east, north, west and north (this is the easier of the two paths). Fight all the folks you come across. When Keats says that is enough better head back. Go south, east, south and west.
Reward: Rare folk Yarthkins
If you want to do the Starving Beithir quest again you can.
Quest: Starving Beithir (again) - Use Beithir and sub-species to defeat folks in Hellrealm
Reward: two Warm Tree Nuts, two Green Ore and two Yellow Dust Stones
Exit the pub and go to O'Connell's house; use the portal to go back to the Hellrealm. Use the glowing flower to go to the Inquisition Bridge. Use the glowing flower to save your game and then head north down the bridge for a scene with Livane. Continue north after the scene and enter the court.
Boss: Yama
Palette:
Fomoire – Mirrors
Beithir – Force Field
Durandal – Yama
Timing and Beat Absorption.
Strategy 1-
Use Fomoire to destroy the mirrors. Attack the mirror that is glowing. Once all the mirrors are gone, Yama will appear with a force field around him use Beithir to break the force field. Once the force field is gone attack him with Durandal.
Strategy 2-
Stay by the wall. Use Fomoire to attack the glowing mirror. Be careful sometimes the mirror throws green balls at you. Once you break one of the mirrors Yama will attack you.
Once all the mirrors have been destroyed Yama will appear. He has a force field around him. He will say "now the birds" and the birds will come out and fly in a circle around him. He will also say "guilty" or you will hear a lock sound, when he says or you hear that run around the wall. He is about to shoot three green balls at you. He sometimes disables your folks. When this happens just dodge his attacks.
Get close enough to Yama to attack him with Beithir. Once you break his force field you need to attack him with Durandal. You don't have to be close to Yama to attack him. Just line Ellen up with Yama and then send out Durandal. He will do some spin move and then run right into Yama. Keep doing this (breaking the force field/attacking him) until you defeat him.
After the scene with Ellen; head south for another scene. Exit O'Connell's house for a scene with Suzette, go to your base and rest. Go to the henge when you wake up, offer the Silver Medallion and enter the door. Once inside the door, go north for a scene with Suzette. After the scene enter the Divine Sanctuary. Head north and try to enter the door for another scene with Suzette.
Chapter 6
Ellen/Keats: Memory
Check List:
Corrupt Village Picture Book Page 1
Through out this chapter you will have a chance to save.
After the scene talk to Suzette, head north for a good scene. Go up to Cecilia and Herve for a scene. Go to the Light House Cape (at the fork in the road take the right path) and go up to Herve and Cecilia for another scene.
From where we are now go north for a scene. We are now at the henge; enter the door and head north for a scene with Dr. Lester and Herve. After the scene go up to the Mnemosyne; defeat the folks here. You will start off with three of them. Once you defeat them a lot more will come. Use Pouke to attack them. There are some memory stones here break them for some health and then enter the door for a scene.
You are now on the Cliff of Sidhe. Head north and you will see a Mnemosyne; go up to it. There are three Patriots, two Padfoot and Volcano; defeat them. Break open the memory stones for some health and then enter the door for another scene.
We are now in Ellen's hut, go to the Mnemosyne and you will be teleported to another battle. Defeat the folks here, break the memory stones for health and then enter the door for a scene.
Go to the Side of the church (where the Warcadia Portal is) for another Mnemosyne. Defeat the folks here, break the memory stones and enter the door for another scene.
We are now in the Devine Sanctuary; head north to find a Mnemosyne and another battle. You will have two Ogma and a Durandal (Use Padfoot) to fight. Once you defeat them, break the memory stone for health and then enter the door for a scene.
Head north for another scene; we are now Ellen. Go north to the glowing purple book page; it is Corrupt Village Picture Book Page 1. Then go back to Keats and talk to him. Use the glowing flower to save your game, set your Palette (see boss: Enigma) and then go to the Mnemosyne.
Boss: Enigma
Palette:
Bullseye – Shield and Body
Barrager – Shield and Body
Ga-Boi – Body
He is easy. Dodge the rocks that fall from the sky. His shield is garbage.
Once you defeat Enigma, there will be some scenes.
Chapter 7
Ellen/Keats: Fear
Check List for both Ellen and Keats:
Ellen
Folks:
|
Agapanthus |
Ammobium |
Bergamot |
|
Gladiolus |
Muscari |
Telanthera |
Watch the scenes.
If you head south from where Keats is there is a Puddles of water. If you step on it, you will go back to Doolin.
Note – If you did not capture every folk from the different Realms now is the time to do it. If you have all the folks at the end of the game, you will be change Ellen and Keats clothes. Now would be a good time to go get them.
Some Rare Folks:
Shefro (Ellen) – Faery Realm
To get Shefro you must capture every folk within the Faery Realm. Then go to or teleport to the Road of Daru. Once there turn left and you should see her. She is going to summon Daru and Ogma. Once you defeat them, use Habetrot and she will summon them back. This will happen about three times and then you should be able to get her.
Candela (Ellen) – Endless Corridor
When you first enter the Endless Corridor, go north. There are about five Candelas in this room. Hit one of them with Ga-Boi to wake it. Then attack it with Pouke. If he stops, moving hit him again with Ga-Boi. If you do not he will self-destruct.
If you have any quest to do with Ellen, go to the pub and do them. Also, Keats is in the pub; if you want to switch to him then talk to him.
Keats
We start in the pub, talk to the pub master for a quest.
Quest: Dark Impulse (Part 1) - find out the truth about Suzette's past and the murder
Keats starts on the Hill of Brimstone. Head north down the path and talk to Frizzie, Mnemosyne and Mnemosyne (this one is a little further down the path). Go back to the first Mnemosyne and talk to it. Go all the way to the Inquisition Bridge; there is another Mnemosyne to talk too. Go down the bridge a little more for another Mnemosyne. Continue down the bridge and talk to Ingrid. Now we are in Dr. Lester's house; talk to Mrs. Lester.
Reward: Ruby
If there are, any folks from the other realms that you need to get you should do it now.
Go to your base, rest and then go to the pub for a quest.
Quest: Wavering Flame - Defeat Bougainvaillea without hurting Telanthera
We start in the Netherworld Core Old Light House Cape. Head north, talk to the Faery. After the conversation, continue north. Defeat the folks in this area, go east and defeat the folks here. Go west, defeat the folks again and then go west again. Defeat the folks and then go north. When you fight the Bougainvaillea, do not attack the Telanthera.
Reward: Rare Folk Alonedite
Rare Folks
Kraken (Keats) – Undersea City
Go north, west, north, north and north again. Use Gargantua and Hinky-Punk to defeat Kraken.
Go to the pub and switch back to Ellen.
Ellen
Talk to the pub master for a quest.
Quest: Dark Impulse (Part 2) - Rescue Suzette from the Netherworld, before she is lost
We start at the Road to Daru. Go north, talk to Keats, Frizzie and the Faery. Then continue north and take the north exit. Run past or you can fight Bargest. Exit this area to the north. Go north, talk to Charlie and Damona for a scene.
We are now on Dwarf Beach. Go east talk to the Mnemosyne, go east and talk to another Mnemosyne. Now go to the Cliff of Sidhe. There is a Mnemosyne talk to it, then go to Harriet's house and talk to the Mnemosyne. Go back to the henge, talk to the Mnemosyne, go to O'Connell's house and Suzette will be outside his house. After talking to her, go to the Mnemosyne next to her.
We are now at Dr. Lester's house; talk to Mrs. Lester. When you can turn right (Ellen's right) and talk to Suzette.
Reward: Yellow Stone
Exit the pub, go to you hut, rest and then go to the Netherworld Core Portal. The Netherworld Core Portal is located at the henge. Talk to the Rebel Denizen and the Faery if you want; head north through the door.
Note – if you want to play as Keats change to him now. He is behind Ellen; just talk to him. For this walkthrough we are going to start off as Ellen.
Continue north down the path. Talk to the Faerys and then continue north to the next area. Three Telantheras will attack you. You can use Pouke to attack them. Take the east exit once you defeat them.
Here you will have two Telantheras to fight. Once you defeat them, break the purple memory stone, using Ga-Boi, for Netherworld Core Picture Book Page 1. Head west towards the exit and a Gladiolus will appear. Use Fomoire, Pouke and Degasser to defeat him.
Now exit this area to the west. You can defeat the Telantheras again if you want; take the west exit. Here you will have two Muscari and a Gladiolus to fight. Use Fomoire to defeat the Muscaris. Once you defeat, them two memory stones will appear, break them for some health and exit the room to the east. You can defeat the folks here if you want and then exit to the south. Talk to Keats so that you can switch to him.
Keats
Folks
|
Bougainvaillea |
Telanthera |
Gladiolus |
|
Bergamot |
Goggie |
Protea |
Continue north down the path. Talk to the Faerys and then continue north to the next area. Three Telantheras will attack you. You can use Pouke to attack them. Take the east exit once you defeat them.
Here you will have three Bougainvilleas to fight. Once you defeat them, break the purple memory stone for Netherworld Core Picture Book Page 1; if you did not get it with Ellen. Head west towards the exit, three Telanthera and a Gladiolus will appear. Use Fomoire, Pouke and Ga-Dearg to defeat Gladiolus.
Now exit this area to the west. You can defeat the Telantheras again if you want; take the west exit. Here you will have three Bougainvilleas and two Gladiolus to fight. Once you defeat them, two memory stones will appear, break them for some health.
If you want to play as Ellen exit this area to the east, then take the south exit and talk to her. Then go back north and then west. You will back in the area where we left off at with Keats.
Continue north to the next area. There is a glowing portal in the northeast section of this area.
Boss: Faery Lord (Keats)
Palette:
Bougainvillea – Force field
Urisk – Faery Lord
Strategy:
The Faery lord will summon Ogma and Bug-A-Boo. Try to avoid fighting them (he will summon them again if you defeat them) and just attack the Faery Lord. Attack the Faery Lord with Bougainvaillea until he does not move. Then attack him with Urisk. When he starts moving again, attack him with Bougainvaillea. Keep this up until you defeat him.
Watch out for his fire bombs and sharp balls that he throws at you.
Once you defeat him watch the scenes; (you are now Ellen) talk to the Faery Lord and Scarecrow. Use the glowing flower to save your game and to go back to Doolin.
Exit the henge; go to your base and rest. When you awake go to the pub for a quest.
Quest: Raging Beast of the Core - Defeat Gladiolus
Go north into the purple glowing portal. Follow the paths until you see a glowing portal. Eventually you will run into two Gladiolus and a third one will appear while you are fighting the other two. Once you defeat them break the memory stones for some health and then go up the stairs. There is another one to fight.
Reward: Rare Folk Cyhyraeth
Exit the pub, go to the henge and enter the Netherworld Core. Use the glowing flower to go back to the Heaven's Field. Enter the glowing purple portal. Defeat the folks here, break the memory stones and exit this area to the north. Here you will have to fight an Agapanthus. Use Degasser and Pouke to defeat him. Once you defeat him two more will come. Defeat them and break open the memory stones. Inside the purple memory stone is Netherworld Core Picture Book Page 2.
Continue up the stairs. Here you will have to fight Agapanthus and three Muscari. You are blocked in… so you must fight them. Once you defeat them break open the memory stones and exit to the north via the glowing portal. In this area, defeat the Bergamot folks. I believe that there are four of them; using Coblynau and Pouke. Once you defeat them, break the memory stones and follow the path to the portal; it is over to the west (it looks like a dead end on your map).
In this area, you have a Bergamot and Ammobium to fight. Use Habetrot and Pouke on Ammobium and Coblynau and Pouke on Bergamot. Go up the stairs and you will have to fight two Agapanthus (Pouke and Degasser). They will jump out of nowhere. Once you defeat them two Bergamots (Coblynau and Pouke) will appear. Defeat them and break open the memory stones.
Go all the way back to where Keats is and switch to him. Use the glowing flower to save your game. Enter the glowing purple portal. Follow the paths and go from portal to portal until you get to stairs where Ellen was. Once you get here go back to where Ellen is and switch to her. Enter the glowing purple portal, go all the way up to the stairs and continue up the stairs to the next area.
Boss: Livane
Palette:
Peg Powler – Force field
Degasser – Livane
Ga-Boi – Livane
Or use any of your strongest folks
Watch out for Livane's spear. She will also summon two flying folks. Don't worry about attack the flying folks. Attack Livane with Peg Powler (about four hits from Peg Powler the force field will disappear). Then attack her with Degasser or who ever you like. Keep doing this and you will beat her in no time.
Once you defeat Livane; you are Keats. Talk to the Faery if you want; take the eastern path for a scene. After the scene go back west and you will run into a Mnemosyne for a scene. You are now Ellen; talk to Keats and then take the eastern path. Run up to the tree for a scene. Go back west. There is now a glowing flower there; save your game. This time take the other (western) path and exit to the north. Watch the scenes.
Boss: Scarecrow (Keats)
Palette:
Two ice folks of you're choosing
One fire folk of you're choosing
Durandal – Scarecrow
Two birds will appear. One is fire and the other is ice. Attack the ice bird with your fire folk. The two birds will throw purple balls at you. Try to avoid them…if they hit you, you will have to absorb which ever bird hit you to get your folks back. Keep attack the ice bird until you only have the fire bird left. Now a black hole will start to appear. When you see it, move. Keep attack the fire bird with your ice folks until it is done. Now use Durandal on Scarecrow. With five good hit from Durandal is all you need to defeat Scarecrow.
Watch the scene.
Boss: Scarecrow (Ellen)
Palette:
Choose out of the folks you have
Beat, Balance, Time, and Stop/Go Absorption. Keats and Livane will help you.
You only have a couple of folks to choose form. Make Degasser one of your choices. There are two birds that you need to attack with Degasser. Dodge the black hole and the five balls that are thrown at you.
Once you absorb the two heads. They will come back to life. This time they will throw bubbles at you; in addition to the five balls and the black hole. Use Degasser to defeat them.
Once you absorb them they will come back to life. This time they will attack you with lighting and three lighting balls; in addition to the five balls and the black hole. Use Peg Powler to attack the birds. Once you absorb them you get all your folks back.
This time Scarecrow will try to attack you with flying birds (two from each side), three big purple balls and the black hole. He also has a force field; use Boobrie to get pat the force field. Once the force field is gone, attack Scarecrow with any folk you like. I used Fomoire, Degasser and Fachan. Keep doing this and you should beat him in no time.
Watch the scenes.
When they are over you will be in your hut. Exit your hut, go talk to O'Connell, Mrs. Lester and the Pub Master. When your done go to Keats base; you have the option to explore or be done. Choose to be done.
Keats will go to Ellen's hut. When you can control him go to the blinking light on the floor for a scene.
The end – if you collected all the folks sit through the credits until you see the end sign before turning off the game.
Downloadable Add-On
Bundle 1:
Download pack 1-
Download pack 2 – Bottom of the Sea
Mystery Messenger, Lost Thoughts 2, Undersea Request and Distant Daughter quest. A new body suit for Keats and a new folk Phutcampus.
Bundle 2:
Download pack 3 - The Alchemist Pack
Penance for Wilde, Tower of Sin, Alchemy Assistant and Tangled Corridor quest, a new Faery Cloak (Blue Faery Cloak Costume) for Ellen and a new folk Scarab.
Download pack4 – The Origin of Belgae
Faery Photo 1, Noises in the Night, Ancient test and Death of a Warrior quest. A new Cloak of the Deep (Wetsuit Costume) and a new folk Radian.
Bundle 3:
Download 5- Nightmares
Faery Photo 2, Root of Fear, Unique Utopia and Dozing Darling quests. Top hat costume for Keats and a new folk Automata.
Download 6- Vision of the Tower
Labyrinth Woes, Tale of the Faery Lord, Near-Death Illusion and Love Letters quests. A new Cloak of Twilight (Special 1 Costume) for Ellen and a new folk Honeypot.
Free Downloadable Add-On
Holiday Add-on -
Holy Night Visitor quest, a Christmas costume for Ellen and Keats, and a new folk Grab Bag.
Create a winner
Quests
Chapter 1
Ellen
The Gig: (Nighttime)
Help Charlie, famous saxophonists, hold a concert.
Reward: two Green Quartz Stones
Defeat Bargest: (Nighttime)
Kill 3 Bargest
Reward: three Pulse Tree Nut, three Warm Tree Nuts and three Cold Tree Nuts
Keats
The Gift: (Nighttime)
Check the perfect gift bought by Renaldo before his death.
Reward: five Golden Ore, five Green Ore and five Green Quartz Stones
Chapter 2
Ellen
Bullseye's Defection: (Nighttime)
Guard Bullseye and Trek to the Warcadia
Reward: Battlefield Cloak
Keats
Shield Wall: (Nighttime)
Defeat the machine soldiers with Bullseye (working as a team with the Bullseye)
Reward: two Yellow Dust Stones
Shield Wall (again): (Nighttime)
Defeat the machine soldiers with Bullseye (working as a team with the Bullseye)
Reward: two Pulse Tree Nut, two Golden Ore and two Green Dust Stones
Bullseye's Request: (Nighttime)
Defeat Brummbear using Warcadia soldiers only
Reward: three Golden Ore, three Green Ore and three Green Quartz Stones
Chapter 3
Ellen:
Voice from Below the Sea:
Unmask the source of the voice from the sea.
Reward: Undersea City Picture Book Page 3 and Yellow Stone
Voice from Below the Sea (again):
Find the source of the voice from below the sea.
Reward: two Pulse Tree Nut, two Golden Ore and two Green Dust Stones
Raging Malabaricus: (Nighttime)
Defeat Malabaricus
Reward: Rare Folk Coropuna
Keats:
Homesick Bug-a-boo: (Nighttime)
Fight folks from entrance of the Faery Realm to the tree using Bug-a-boo.
Reward: three Pulse Tree Nuts, three Warm Tree Nuts and three Cold Tree Nuts
Lost Annwn: (Nighttime)
Use Annwn to escort Annwn to Forgotten Palace
Reward: Rare Folk Tathlum
Chapter 4
Ellen
Thanatophobia: (Daytime)
Find medicine undersea to treat overdrinking pub landlord
Reward: three Green Dust Stones, three Yellow Dust Stones and three Purple Dust Stones
Keats
Difficult Patient: (Daytime)
Find out how Dr. Lester took Herve on as a patient
Reward: Undersea City Picture Book Page 2 and Emerald
Mystery Letter: (Daytime)
Solve the mystery of the letter and go to the location
Reward: three Green Dust Stones, three Yellow Dust Stones and three Purple Dust Stones
Chase Away the Thug: (Nighttime)
Chase the thug, Wilde, from the henge
Reward: Warcadia Picture Book Page 3 and Ruby
Chapter 5
Ellen
The girl and the robot: (Daytime)
Find out if Charlotte's dreams are caused by a quarrel
Reward: five Pulse Tree Nut, five Warm Tree Nuts and Cold Tree Nut
Voices of Vengeance: (Daytime)
Find the cause of Charlotte's nightmares
Reward: three Golden Ore, three Green Ore and three Green Quartz Stones
The Pioneer: (Nighttime)
Reward: Endless Corridor Picture Book Page 1 and purple stone
Mandragora, the Delicacy: (Nighttime)
Catch three Mandragora within the time limit
Reward: Rare folk Grindylow
Urisk Gathering: (Nighttime)
Disband the Urisk gathering
Reward: Rare folk Alhazred
Keats
Frizzie's Love: (Nighttime)
Frizzie fancies someone. Find out whom
Reward: Endless Corridor Picture Book Page 2 and emerald
Stolen Bottle: (Nighttime)
Defeat Boggart and retrieve the bottle
Reward: Rare folk Langelaan
Starving Beithir: (Nighttime)
Use Beither and sub-species to defeat folks in Hellrealm
Reward: Rare folk Yarthkins
Starving Beithir (again): (Nighttime)
Use Beithir and sub-species to defeat folks in Hellrealm
Reward: two Warm Tree Nuts, two Green Ore and two Yellow Dust Stones
Chapter 7
Ellen
Raging Beast of the Core: (Nighttime)
Defeat Gladiolus
Reward: Rare Folk Cyhyraeth
Dark Impulse (again): (Daytime)
Rescue Suzette from the Netherworld, before she is lost
Reward: Yellow Stone
Keats
Dark Impulse: (Daytime)
Find out the truth about Suzette's past and the murder
Reward: Ruby
Wavering Flame: (Nighttime)
Defeat Bougainvaillea without hurting Telanthera
Reward: Rare Folk Alonedite
Cloak List
|
Cloak of Sidhe |
a cloak from the faery realm |
|
Faery Cloak |
resists bond and sleep |
|
Battle Cloak |
resists destroy and slash |
|
Cloak of the Deep |
resists water |
|
Cloak of Dawn |
resists thunder |
|
Cloak of Twilight |
resists wind and prevents charm |
|
Cloak of the Midnight Sun |
shortens MC recovery time |
Ellen's Folk List
|
Folk |
Found in |
Folk to use to defeat |
|
Agapanthus |
Netherworld Core |
Pouke |
|
Alhazred |
|
|
|
Alraune |
Undersea City |
Degasser, Bargest |
|
Ambush |
Warcadia |
Pouke |
|
Ammobium |
Netherworld Core |
Habetrot, Pouke |
|
Answerer |
Endless Corridor |
Ga-Boi, Degasser, Pouke |
|
Ascidia |
Undersea City |
Pouke |
|
Asrai |
Undersea City |
Degasser |
|
Baogbolc |
Hellrealm |
Pouke, Garbera |
|
Baolwind |
Hellrealm |
Mandragora, Fachan |
|
Bargest |
Faery Realm |
Ogma |
|
Barrager |
Warcadia |
Pouke |
|
Beithir |
Hellrealm |
Pouke |
|
Bergamot |
Netherworld Core |
Coblunau, Pouke |
|
Boggart |
Hellrealm |
Hawk, Ogma |
|
Boobrie |
Faery Realm |
Pouke |
|
Brollachan |
Endless Corridor |
Pouke, Degasser |
|
Browney |
Faery Realm |
Henky |
|
Bug-A-Boo |
Faery Realm |
Cait Sidhe |
|
Bullseye |
Warcadia |
Pouke |
|
Caesg |
Hellrealm |
Habetrot |
|
Cait Sidhe |
Faery Realm |
Pouke |
|
Candela |
Endless Corridor |
Ga-Boi (to wake it), Pouke |
|
Coblynau |
Hellrealm |
Daru |
|
Coropuna |
|
|
|
Cu Sidhe |
Undersea City |
Dracae |
|
Cyhyraeth |
|
|
|
Daru |
Faery Realm |
Cait Sidhe |
|
Degasser |
Warcadia |
Hawk, Bullseye, Barrager |
|
Dracae |
Undersea City |
Ga-Boi, Degasser |
|
Fachan |
Hellrealm |
Habetrot |
|
Fomoire |
Hellrealm |
Hawk |
|
Fraxinus |
Undersea City |
Degasser, Pouke |
|
Ga-Boi |
Warcadia |
Degasser |
|
Garbera |
Endless Corridor |
Pouke, Degasser |
|
Gargantua |
Warcadia |
Degasser, Ambush |
|
Gladiolus |
Netherworld Core |
|
|
Grindylow |
|
|
|
Habetrot |
Endless Corridor |
Coropuna, Ga-Boi, Pouke |
|
Hawk |
Warcadia |
Pouke |
|
Henky |
Faery Realm |
Pouke |
|
Hobbledy |
Undersea City |
Degasser |
|
Humpty |
Endless Corridor |
Pouke |
|
Impet |
Faery Realm |
Henky |
|
Killmoulis |
Faery Realm |
Pouke |
|
Luideag |
Endless Corridor |
Pouke, Degasser |
|
Mabinogion |
Endless Corridor |
Peg Powler |
|
Malabaricus |
Undersea City |
Ga-Boi, Gargantua |
|
Mandragora |
Hellrealm |
Garbera |
|
Morallta/Beagallta |
Hellrealm |
|
|
Muscari |
Netherworld Core |
Garbera |
|
Ogma |
Faery Realm |
Impet, Pouke |
|
Patriot |
Warcadia |
Degasser |
|
Peg Powler |
Undersea City |
Degasser, Pouke |
|
Pouke |
Faery Realm |
Pouke |
|
Shefro |
Faery Realm |
Habetrot |
|
Skeiker |
Endless Corridor |
Peg Powler |
|
Spriggan |
Endless Corridor |
Answerer, Ga-Boi, Degasser, Pouke |
|
Telanthera |
Netherworld Core |
Pouke |
|
Thrumpin |
Endless Corridor |
Pouke |
|
Ulbyr |
Hellrealm |
Garbera |
|
Ulghter |
Hellrealm |
Garbera |
|
Warthog |
Warcadia |
Degasser |
|
Wryneck |
Hellrealm |
Daru, Degasser, Bargest, Garbera, Pouke |
Keats Folk List
|
Folk |
Found in |
Folk to use to defeat |
|
Afanc |
Undersea City |
Bullseye, Brummbear |
|
Agapanthus |
Netherworld Core |
Ga-Dearg, Fomoire |
|
Agar-Agar |
Undersea City |
Annwn, Ga-Dearg |
|
Alonedite |
|
|
|
Amaryllis |
Netherworld Core |
Agapanthus |
|
Ammobium |
Netherworld Core |
Poury, Brummbear, Bullseye |
|
Andraste |
Faery Realm |
Poury |
|
Annwn |
Undersea City |
Pouke, Hawk |
|
Answerer |
Endless Corridor |
Bullseye, Brummbear |
|
Asrai |
Undersea City |
Hawk, Ga-Dearg |
|
Aughisky |
Undersea City |
Bullseye |
|
Baolydead |
Endless Corridor |
Poury |
|
Baogynis |
Hellrealm |
Hawk, Brollachan |
|
Bargest |
Faery Realm |
Hinky-Punk |
|
Barrager |
Warcadia |
Pouke |
|
Beither |
Hellrealm |
Hawk, Poury |
|
Bergamot |
Netherworld Core |
Bullseye |
|
Boggart |
Hellrealm |
Hawk, Bullseye, Brollachan |
|
Bougainvaillea |
Netherworld Core |
Annwn |
|
Brollachan |
Endless Corridor |
Hawk |
|
Brummbear |
Warcadia |
Bullseye, Barrager |
|
Bug-A-Boo |
Faery Realm |
Hinky-Punk |
|
Bullseye |
Warcadia |
Pouke |
|
Coblynau |
Endless Corridor |
Pouke |
|
Drarucu |
Undersea City |
Poury |
|
Durandal |
Endless Corridor |
Poury |
|
Exedra |
Undersea City |
Hinky-Punk, Volcano |
|
Fomoire |
Hellrealm |
Bullseye |
|
Ga-Dearg |
Warcadia |
Andraste, Bargest |
|
Galley-Beggar |
Endless Corridor |
Bullseye |
|
Gargantua |
Warcadia |
Brummbear |
|
Gladiolus |
Netherworld Core |
Ga-Dearg |
|
Goggie |
Netherworld Core |
Pouke |
|
Habetrot |
Endless Corridor |
Hawk, Brollachan |
|
Hawk |
Warcadia |
Pouke, Bullsye |
|
Hinky-Punk |
Faery Realm |
Treant, Ogma |
|
Kalmia |
Hellrealm |
Aughisky |
|
Killmoulis |
Faery Realm |
Pouke |
|
Kraken |
Undersea City |
Gargantua, Hinky-Punk |
|
Langelaan |
|
|
|
Luideag |
Endless Corridor |
Bullseye |
|
Mandragora |
Hellrealm |
Hawk, Brollachan |
|
Ogma |
Faery Realm |
Pouke |
|
Padfoot |
Endless Corridor |
Volcano |
|
Patriot |
Warcadia |
Brummbear, Ga-Dearg |
|
Pouke |
Faery Realm |
Poury |
|
Poury |
Faery Realm |
Pouke |
|
Protea |
Netherworld Core |
Agapanthus |
|
Protta |
Netherworld Core |
Agapanthus |
|
Selkie |
Undersea City |
Drarucu |
|
Spriggan |
Endless Corridor |
Ogma, Answerer |
|
Tathlum |
|
|
|
Telanthera |
Netherworld Core |
Bullseye |
|
Thrumpin |
Endless Corridor |
Bargest |
|
Treant |
Faery Realm |
Pouke |
|
Ulhgik |
Hellrealm |
Hinky-Punk |
|
Urisk |
Hellrealm |
Selkie, Aughisky |
|
Volcano |
Warcadia |
Bullseye, Barrager, Pouke |
|
Yarthkin |
|
|
Folks Karma Release
Note - When it says to defeat a folk do not absorb them. Once their Id is red continue to them until they disappear. Which ever folk you are trying the Karma for you must use that folk and only that folk. For example if you are trying to get Boobrie you will need to do:
1. Absorb 3 Boobrie 2. Use 10 Green Dusts 3. Defeat 10 Folks 4. Defeat 5 Mandragora But it all has to be done with Boobrie. Faery Realm Ellen Bargest 1. Absorb 1 Bargest 2. Defeat 2 Gargantuas Boobrie 1. Absorb 3 Boobries 2. Use 10 Green Dusts 3. Defeat 10 Folks 4. Defeat 5 Mandragoras Bug-a-boo 1. Use 5 Pulse Tree Nuts 2. Absorb 5 Bug-a-boos 3. Defeat 10 Folks 4. Defeat 2 Boobries Browney 1. Use 1 Purple Liquid 2. Use 5 Purple Dusts 3. Absorb 3 Browneys 4. Absorb 5 Browneys Cait Sidhe 1. Use 1 Green Liquid 2. Use 10 Yellow Dusts 3. Absorb 3 Cait Sidhes Daru 1. Absorb 3 Daru 2. Absorb 5 Daru 3. Defeat 10 Folks 4. Defeat 2 Fraximus Henky 1. Absorb 10 Henkys 2. Use 5 Cold Tree Nuts 3. Defeat 3 Impets 4. Defeat 3 Browneys Impet 1. Use 1 Aqua Liquid 2. Absorb 3 Impets 3. Absorb 5 Impets 4. Use 10 Yellow Dusts Killmoulis 1. Absorb 5 Killmoulis 2. Absorb 10 Killmoulis 3. Use 5 Tree Pulse Nuts Ogma 1. Absorb 3 Ogma 2. Use 5 Gold Ores 3. Defeat 5 Cu Sidhes 4. Defeat 3 Spriggans Pouke 1. Absorb 5 Poukes 2. Absorb 10 Poukes 3. Use 10 Pulse Nuts 4. Defeat 5 Hawks Shefro 1. Use 10 Purple Dusts 2. Use 10 Pulse Tree Nuts Keats Andraste 1. Defeat 10 Folks 2. Defeat 15 Folks 3. Use 5 Pulse Tree Nuts 4. Absorb 1 Andraste Bargest 1. Defeat 30 Folks 2. Defeat 1 Fomoire 3. Use 4 Emeralds Bug-a-boo 1. Use 5 Pulse Tree Nuts 2. Use 5 Pulse Tree Nuts 3. Defeat 5 Bug-a-boos Hinky-Punk 1. Absorb 3 Hinky-Punks 2. Absorb 5 Hinky-Punks 3. Defeat 2 Bargests 4. Use 3 Rubies Killmoulis 1. Absorb 5 Killmoulis 2. Absorb 10 Killmoulis 3. Use 5 Tree Pulse Nuts Ogma 1. Absorb 1 Ogma 2. Defeat 8 Folks 3. Defeat 3 Treants 4. Defeat 3 Spriggans Pouke 1. Absorb 5 Poukes 2. Absorb 10 Poukes 3. Use 10 Pulse Nuts 4. Defeat 5 Brollachans Poury 1. Use 1 Red Liquid 2. Use 5 Yellow Dusts 3. Use 5 Pulse Tree Nuts Treant 1. Absorb 5 Treants 2. Defeat 8 Folks 3. Defeat 2 Ogmas 4. Use 10 Yellow Dusts Warcadia Ellen Ambush 1. Absorb 10 Ambushs 2. Defeat 10 Hawks 3. Defeat 3 Skrikers 4. Defeat 3 Ammobiums Barrager 1. Absorb 10 Barragers 2. Defeat 5 Bullseyes 3. Defeat 5 Poukes 4. Defeat 5 Telantheras Bullseye 1. Use 5 Pulse Tree Nuts 2. Absorb 5 Bullseyes 3. Absorb 10 Bullseyes 4. Defeat 3 Brollachans Degasser 1. Absorb 3 Degassers 2. Defeat 1 Fomoire 3. Use 10 Yellow Dusts Ga-Boi 1. Absorb 3 Ga-Bois 2. Use 3 Purple Stones 3. Defeat 3 Patriots Gargantua 1. Absorb 3 Gargantuas 2. Use 5 Green Oress 3. Defeat 20 Folks 4. Use 1 Golden Ore Hawk 1. Use 5 Pulse Tree Nuts 2. Absorb 5 Hawks 3. Absorb 10 Hawks 4. Defeat 3 Luideags Patriot 1. Absorb 6 Patriots 2. Use 5 Green Ores 3. Use 1 Golden Ore Warthog 1. Defeat 10 Folks 2. Absorb 5 Warthogs 3. Defeat 5 Barragers 4. Defeat 1 Malabaricus Keats Barrager 1. Absorb 5 Barragers 2. Absorb 10 Barragers 3. Defeat 10 Folks 4. Defeat 4 Afancs Brummbear 1. Absorb 3 Brummbears 2. Defeat 5 Folks 3. Defeat 10 Folks 4. Defeat 2 Gargantuas Bullseye 1. Defeat 2 Volcanoes 2. Defeat 3 Selkies 3. Absorb 5 Bullseyes 4. Absorb 10 Bullseyes Ga-Dearg 1. Absorb 3 Ga-Dreags 2. Absorb 5 Ga-Dreags 3. Defeat 15 Folks 4. Defeat 3 Galley-Beggars Gargantua 1. Defeat 15 Folks 2. Use 10 Green Ores 3. Defeat 1 Gargantua Hawk 1. Absorb 5 Hawks 2. Absorb 10 Hawks 3. Defeat 3 Brummbears 4. Use 5 Green Dusts Patriot 1. Absorb 6 Patriots 2. Use 5 Green Dusts 3. Use 5 Green Ores Volcano 1. Absorb 1 Volcano 2. Defeat 10 Hawks 3. Defeat 10 Folks Undersea City Ellen Ascidia 1. Use 5 Green Dusts 2. Use 5 Purple Dusts Alraune 1. Defeat 10 Alraunes 2. Defeat 5 Asrais 3. Defeat 5 Folks 4. Use 5 Green Dusts Asrai 1. Absorb 5 Asrais 2. Absorb 10 Asrais 3. Use 5 Cold Tree Nuts 4. Defeat 5 Thrumpins Cu Sidhe 1. Use 1 Purple Liquid 2. Use 5 Yellow Dusts 3. Absorb 3 Cu Sidhes 4. Absorb 5 Cu Sidhes Dracae 1. Use 1 Aqua Liquid 2. Use 10 Yellow Dusts 3. Absorb 10 Dracaes 4. Use 10 Green Dusts Fraxinus 1. Absorb 1 Fraxinus 2. Defeat 10 Folks 3. Defeat 3 Ogmas 4. Use 3 Golden Ores Hobbledy 1. Use 5 Warm Tree Nuts 2. Defeat 5 Answerers 3. Use 10 Warm Tree Nuts 4. Absorb 8 Hobbledys Malabaricus 1. Defeat 15 Folks 2. Use 5 Green Quartz 3. Absorb 3 Malabaricus 4. Defeat 5 Boggarts Peg Powler 1. Defeat 10 Folks 2. Defeat 5 Maginogions 3. Use 10 Cold Tree Nuts Keats Afanc 1. Absorb 3 Afnacs 2. Use 5 Cold Tree Nuts 3. Defeat 10 Folks 4. Defeat 15 Boggarts Agar-Agar 1. Use 1 Green Quartz 2. Use 3 Green Quartz Annwn 1. Absorb 5 Annwns 2. Absorb 8 Annwns 3. Defeat 5 Asrais 4. Use 5 Cold Tree Nuts Asrai 1. Absorb 5 Asrais 2. Absorb 10 Asrais 3. Use 5 Cold Tree Nuts 4. Defeat 5 Annwns Aughisky 1. Absorb 1 Aughiskys 2. Absorb 3 Aughiskys 3. Absorb 5 Aughiskys 4. Use 5 Cold Tree Nuts Drarucu 1. Use 1 Red Liquid 2. Defeat 5 Folks 3. Defeat 5 Boggarts 4. Absorb 3 Drarucus Exedra 1. Defeat 5 Folks 2. Defeat 10 Bougainvailleas 3. Use 5 Cold Tree Nuts 4. Use 1 Golden Ore Kraken 1. Defeat 10 Folks 2. Defeat 10Bougainvailleas Selkie 1. Use 5 Cold Tree Nuts 2. Defeat 5 Urick 3. Absorb 3 Selkie 4. Absorb 5 Selkie Endless Corridor Ellen Answerer 1. Absorb 3 Answerer 2. Absorb 5 Answerer 3. Defeat 10 Folks 4. Defeat 3 Bargests Brollachan 1. Absorb 5 Brollachan 2. Absrob 10 Brollachan 3. Defeat 15 Folks 4. Defeat 5 Thrumpin Candela 1. Defeat 10 Folks 2. Defeat 15 Folks 3. Defeat 10 Cu Sidhe Garbera 1. Defeat 5 Folks 2. Defeat 10 Ulghter 3. Use 5 Warm Tree Nuts Habetrot 1. Use 1 Purple Stone 2. Use 5 Green Quartzs 3. Use 5 Green Dusts 4. Absorb 3 Habetrot Humpty 1. Absorb 5 Humpty 2. Defeat 3 Baolwind 3. Defeat 5 Beithir 4. Use 5 Green Dusts Luideag 1. Absorb 3 Luideag 2. Defeat 10 Brollachan 3. Defeat 2 Luideag Mabinogion 1. Absorb 5 Mabinogion 2. Absorb 10 Mabinogion 3. Use 5 Purple Dusts 4. Defeat 5 Henky Skriker 1. Absorb 5 Skriker 2. Absorb 10 Skriker 3. Defeat 15 Folks Spriggan 1. Absorb 5 Spriggan 2. Use 5 Golden Ores 3. Use 3 Yellow Stones Thrumpin 1. Absorb 5 Thrumpin 2. Use 5 Purple Dusts 3. Use 5 Pulse Tree Nuts 4. Absorb 10 Thrumpin Keats Answerer 1. Absorb 5 Answerer 2. Defeat 10 Folks 3. Defeat 15 Folks 4. Defeat 1 Bargest Brollachan 1. Absorb 5 Brollachan 2. Absrob 10 Brollachan 3. Defeat 15 Folks 4. Defeat 5 Thrumpin Galley-Beggar 1. Absorb 5 Galley-Beggar 2. Defeat 15 Folks 3. Defeat 3 Gladioli Habetrot 1. Absorb 3 Habetrot 2. Defeat 10 Folks 3. Defeat 20 Folks 4. Use 5 Green Ores Luideag 1. Absorb 3 Luideag 2. Defeat 10 Brollachan 3. Defeat 10 Folks 4. Defeat 1 Fomoire Padfoot 1. Use 5 Yellow Dusts 2. Defeat 3 Colbynaus 3. Absorb 8 Padfoot Spriggan 1. Absorb 5 Spriggan 2. Use 5 Yellow Dusts 3. Use 3 Golden Ores Thrumpin 1. Absorb 5 Thrumpin 2. Defeat 10 Kilmoulis 3. Absorb 10 Thrumpin 4. Use 5 Warm Tree Nuts Hellrealm Ellen Baogbolc 1. Absorb 3 Baogbolc 2. Absorb 5 Baogbolc 3. Defeat 20 Folks 4. Defeat 10 Hawks Baolwind 1. Absorb 3 Baolwind 2. Absorb 5 Baolwind 3. Defeat 20 Folks 4. Defeat 15 Browneys Beither 1. Use 5 Green Dusts 2. Use 5 Green Ore 3. Absorb 5 Beither 4. Defeat 20 Folks Boggart 1. Absorb 5 Boggart 2. Absorb 10 Boggart 3. Defeat 5 Folks 4. Defeat 10 Folks Caesg 1. Use 5 Purple Dusts 2. Use 5 Yellow Dusts 3. Use 5 Green Dusts Coblynau 1. Use 5 Pulse Tree Nuts 2. Use 5 Purple Dusts 3. Absorb 2 Coblynau 4. Absorb 3 Coblynau Fachan 1. Absorb 3 Fachan 2. Absorb 5 Fachan 3. Defeat 10 Folks 4. Use 5 Yellow Dusts Fomoire 1. Defeat 1 Fomoire 2. Defeat 3 Gladioli Mandragora 1. Absorb 3 Mandragora 2. Absorb 5 Mandragora 3. Defeat 15 Folks with Mandragora 4. Use 5 Warm Tree Nuts Morallta/Beagallta 1. Absorb 1 Morallta/Beagallta 2. Defeat 10 Brollachan 3. Defeat 3 Luideag Ulbyr 1. Absorb 3 Ulbyr 2. Absorb 5 Ulbyr 3. Use 5 Warm Tree Nuts Ulghter 1. Absorb 5 Ulghter 2. Absorb 10 Ulghter 3. Use 5 Cold Tree Nuts 4. Use 5 Cold Tree Nuts Wryneck 1. Absorb 5 Wryneck 2. Absorb 10 Wryneck 3. Absorb 15 Wryneck 4. Defeat 20 Pouke Keats Baogynis 1. Absorb 5 Baogynis 2. Defeat 20 Folks 3. Use 5 Purple Dusts 4. Use 5 Yellow Dusts Baolydead 1. Use 5 Green Dusts 2. Absorb 10 Baolydeads 3. Use 5 Green Ores 4. Defeat 5 Baogynises Beither 1. Defeat 5 Baolydead 2. Use 5 Purple Dusts 3. Absorb 5 Beithers 4. Defeat 20 Folks Boggart 1. Absorb 5 Boggart 2. Absorb 10 Boggart 3. Defeat 15 Folks 4. Defeat 15 Poukes Coblynau 1. Use 5 Yellow Dusts 2. Use 5 Pulse Tree Nuts 3. Absorb 5 Colbynau Durandal 1. Defeat 1 Bargest 2. Defeat 5 Prottas 3. Use 5 Green Ores 4. Use 5 Golden Ores Fomoire 1. Absorb 1 Fomoire 2. Defeat 30 Folks 3. Defeat 1 Fomoire 4. Defeat 1 Gargantua Kalmia 1. Defeat 10 Boggarts 2. Use 5 Purple Dusts 3. Use 5 Purple Dusts Mandragora 1. Absorb 3 Mandragora 2. Absorb 5 Mandragora 3. Defeat 10 Folks 4. Use 5 Pulse Tree Nuts Ulhgik 1. Absorb 5 Ulhgik 2. Use 5 Cold Tree Nuts 3. Defeat 5 Urisks 4. Defeat 10 Folks Urisk 1. Use 5 Warm Tree Nuts 2. Absorb 8 Urisk 3. Defeat 10 Folks 4. Defeat 5 Ulhgiks Netherworld Core Ellen Agapanthus 1. Absorb 5 Agapanthus 2. Defeat 10 Folks 3. Defeat 1 Habetrot Ammobium 1. Absorb 5 Ammobium 2. Defeat 3 Ga-Bois 3. Use 5 Pulse Tree Nuts Bergamont 1. Use 5 Green Dusts 2. Defeat 10 Folks 3. Absorb 8 Bergamonts Gladiolus 1. Absorb 3 Gladiolus 2. Defeat 25 Folks Muscari 1. Use 5 Purple Dusts 2. Use 5 Warm Tree Nuts Telanthera 1. Absorb 5 Telantheras 2. Absorb 10 Telantheras 3. Defeat 5 Muscaris Keats Agapanthus 1. Absorb 5 Agapanthus 2. Defeat 10 Folks 3. Use 10 Green Dusts Amaryllis 1. Use 5 Rubies 2. Absorb 3 Amaryllis Ammobium 1. Absorb 3 Ammobium 2. Defeat 10 Folks 3. Defeat 1 Andraste Bergamont 1. Absorb 3 Bergamont 2. Defeat 10 Folks 3. Defeat 5 Ammobia Bougainvaillea 1. Defeat 10 Folks 2. Use 15 Warm Tree Nuts Gladiolus 1. Absorb 3 Gladiolus 2. Use 5 Golden Ores 3. Defeat 25 Folks Goggie 1. Defeat 5 Bergamonts 2. Absorb 5 Goggie 3. Absorb 10 Goggie Protea 1. Defeat 3 Bougainvallea 2. Use 5 Cold Tree Nuts 3. Absorb 5 Protea Protta 1. Absorb 3 Protta 2. Absorb 5 Protta 3. Absorb 10 Protta Telanthera 1. Defeat 5 Bullseyes 2. Defeat 3 Brummbears 3. Defeat 1 Volcano Quests Ellen Alhazred 1. Defeat 3 Peg Powler 2. Defeat 1 Makabaricus 3. Use 5 Green Dusts Coropuna 1. Defeat 3 Ga-Bois 2. Defeat 1 Gargantua 3. Defeat 3 Spriggan Cyhyraeth 1. Use 10 Green Quartz 2. Use 10 Green Ore 3. Use 5 Golden Ore Grindylow 1. Defeat 5 Folks 2. Defeat 8 Folks 3. Use 1 Yellow Stone Keats Alonedite 1. Defeat 10 Folks 2. Use 10 Green Quartzs 3. Defeat 3 Spriggans Langelaan 1. Defeat 3 Drarucus 2. Use 3 Emeralds 3. Use 10 Pulse Tree Nuts Tathlum 1. Defeat 3 Andrastes 2. Defeat 15 Folks 3. Defeat 20 Folks Yarthkins 1. Defeat 5 Mandragoras 2. Defeat 3 CoblynausExtra
Ellen
Grab Bag
Honeypot
Phutcampus
Radian
Keats
Automata
Grab Bag
Maximilian
Scarab
Quasarilli
Frequently asked questions
How to find the Skeiker-
The Skeiker is in the room where you had to fight only the Mabinogion in the Endless Corridor. To defeat him you will have to use Peg Powler. Once you defeat him, just exit the room the same way that you came in and re-enter the room to continue with the game.
How do I find and defeat Drarucu?
When you first enter the Undersea City you are in an area with Faerys. From here go north there will be three Asrais to fight. Once you defeat them head east. Here you will have Annwn and Drarucu to fight. Use any of your Warcadia folks on Drarucu. You might not see him when you come in because he is hiding under ground. All you will see is something that looks like a rock... hit it with your Warcadia folks to make him come from under ground.
| Total Sales |
0.05m
Japan |
0.20m
NA |
0.04m
Europe |
0.03m
Others |
0.32m
Total |
| 1 | 16,939 | n/a | n/a | 16,939 | |
| 2 | 6,083 | n/a | n/a | 6,083 | |
| 3 | 3,633 | n/a | n/a | 3,633 | |
| 4 | 2,572 | n/a | n/a | 2,572 | |
| 5 | 1,918 | n/a | n/a | 1,918 | |
| 6 | 1,941 | n/a | n/a | 1,941 | |
| 7 | 1,487 | n/a | n/a | 1,487 | |
| 8 | 1,179 | n/a | n/a | 1,179 | |
| 9 | 1,046 | n/a | n/a | 1,046 | |
| 10 | 788 | n/a | n/a | 788 |
|
|
thewastedyouth
posted 28/12/2012, 03:33
DAMMIT NOOO, why did people not buy this it is pretty good, dammit I hate all the people that don't buy ps3 exclusives Message | Report |
|
|
|
|
|
|
|
|
arcane_chaos
posted 21/06/2011, 08:18
damn...I didn't know the sales were this low, this game was so good, truly a shame Message | Report |
|
|
|
|
|
|
About Us |
Terms of Use |
Privacy Policy |
Advertise |
Staff |
Contact
Display As Desktop
Display As Mobile
© 2006-2024 VGChartz Ltd. All rights reserved.